Integrating Google Forms with Slack Using Taskade to Streamline Your Workflow
Imagine collecting data from various sources and instantly sharing it with your team in an easily digestible format. That’s the dream, right? In this guide, we’...
Imagine collecting data from various sources and instantly sharing it with your team in an easily digestible format. That’s the dream, right? In this guide, we’ll teach you how to integrate Google Forms with Slack using Taskade to bridge the gap between data and team communication.

🤔 Understanding the Integration
Before we get into the nitty-gritty, let’s explain a few basic concepts.
If you're new here... Taskade is an AI-powered project management and collaboration platform that combines the simplicity of to-do lists with advanced productivity features.
And that takes us to Automation Flows.
Taskade automation features allow you to put repetitive tasks on autopilot and seamlessly manage all the tools you're already using. This means less manual work and more time for high-level work.
Every automation consists of two parts: triggers and actions. Triggers initiate the process, while actions are the responses that follow. This relationship builds on a simple "if this, then that" logic.
In this example, we're going to use a Google Forms integration and Slack integration in Taskade.
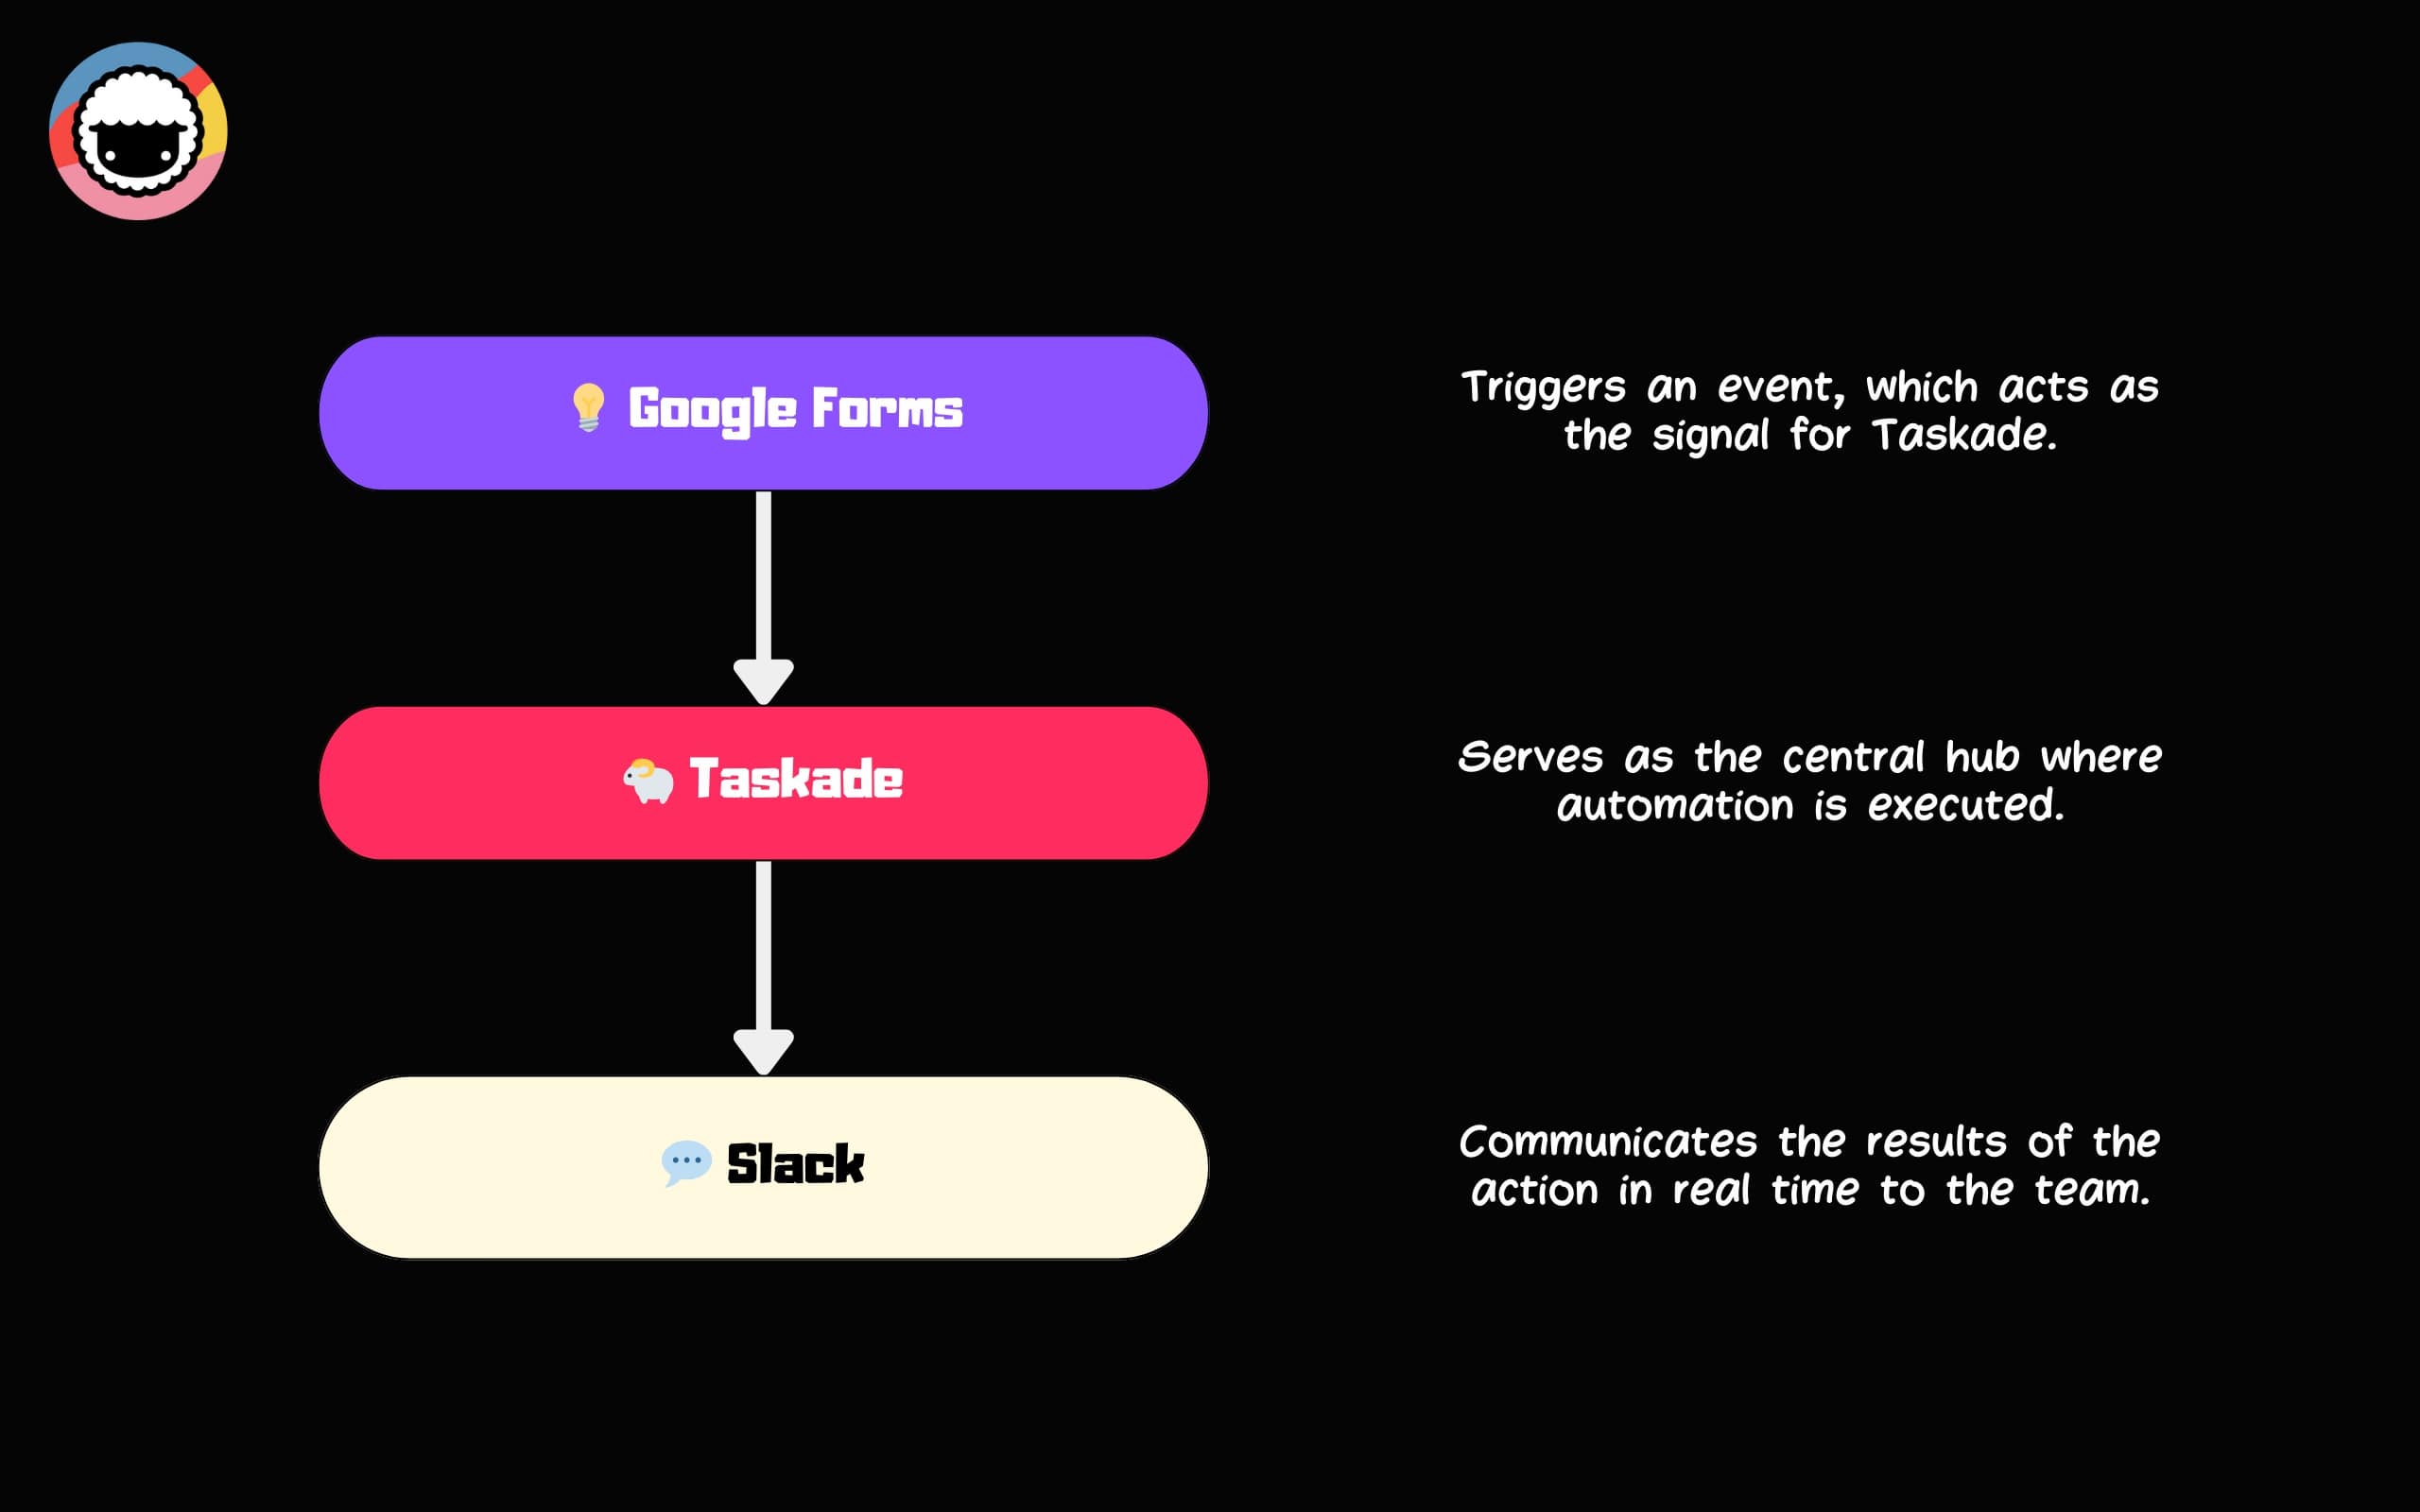
Google Forms is a powerful tool for creating surveys and collecting data within Google’s ecosystem. Slack is a chat-based platform that allows teams to communicate and collaborate in real time.
Taskade acts as a bridge between these platforms. It enables seamless communication and data sharing between Google Forms and Slack, as well as within your Taskade projects.
⚡ Benefits of Integrating Google Forms with Slack
Workflow automation gives you endless possibilities. It lets you mix and match all the elements of your digital toolbox and easily control the flow of information. Once you learn how to integrate Google Forms with Slack, you will be able to explore diverse use cases.
🎉 Event planning: An event team organizing a conference can use Google Forms to gather RSVPs. As responses roll in, Taskade can automatically send updates to a dedicated Slack channel. This will help keep the team in the know about attendance.
👍 Feedback collection: After launching a new product, a company can use the Google Forms integration in Taskade to collect customer feedback. Taskade can then send each new response directly to a designated Slack channel to help the team address issues.
📋 Team surveys: HR departments can conduct employee satisfaction surveys through Google Forms. With Taskade, survey responses can be sent to a private Slack channel for HR to review. This, in turn, can improve workplace morale and engagement.
💡 Content idea submissions: A content team can use Google Forms to gather ideas for blog posts or video content from other teams across the company. Taskade can then automatically alert the team of new ideas by sending them to a specific Slack channel.
🙋 Volunteer coordination: Nonprofits can use Google Forms to sign up volunteers for events or activities. Taskade can then send this information to Slack and help coordinators keep track of volunteer numbers and roles to make sure that events are properly staffed.
And many more!
As you can see, there are many different ways to integrate Google Forms with Slack. And we haven’t even discussed other automation connectors you can throw into the mix (we’ll get to that in a bit).
Alright, but how do we go from an idea to execution?
Well, step by step, of course!
🔄 Step-by-Step Guide to Integration Using Taskade
There are two ways to build automations in Taskade.
You can start from scratch and set everything up yourself. Or you can use our Automation Generator that will whip up a basic automation flow you can then customize yourself.
In this example, we’re taking the easy route. 👇
👉 Don't have a Taskade account? Create one here!
Step 1: Decide What You Want to Automate
Automations can save you a ton of time, but you need to be strategic about it. You don’t want to spend 5 hours setting up an elaborate automation flow that will save you 10 seconds/week.
So, what's the best place to start?
Before you begin connecting Google Forms to Slack, identify repetitive tasks that consume significant time and resources. Focus on areas that can provide the highest return on investment in terms of time saved and efficiency gained. Prioritize processes that are integral to your workflow.
Let’s say your team is hosting a series of webinars and you want to handle registrations and updates. You can easily automate the process and keep everyone involved in the loop. Here's how it works.
Step 2: Set Up Google Forms
To collect the data, we need to build a form in Google Forms.
Open a form in Google Forms.
Click Add
.
Choose the type of question you want.
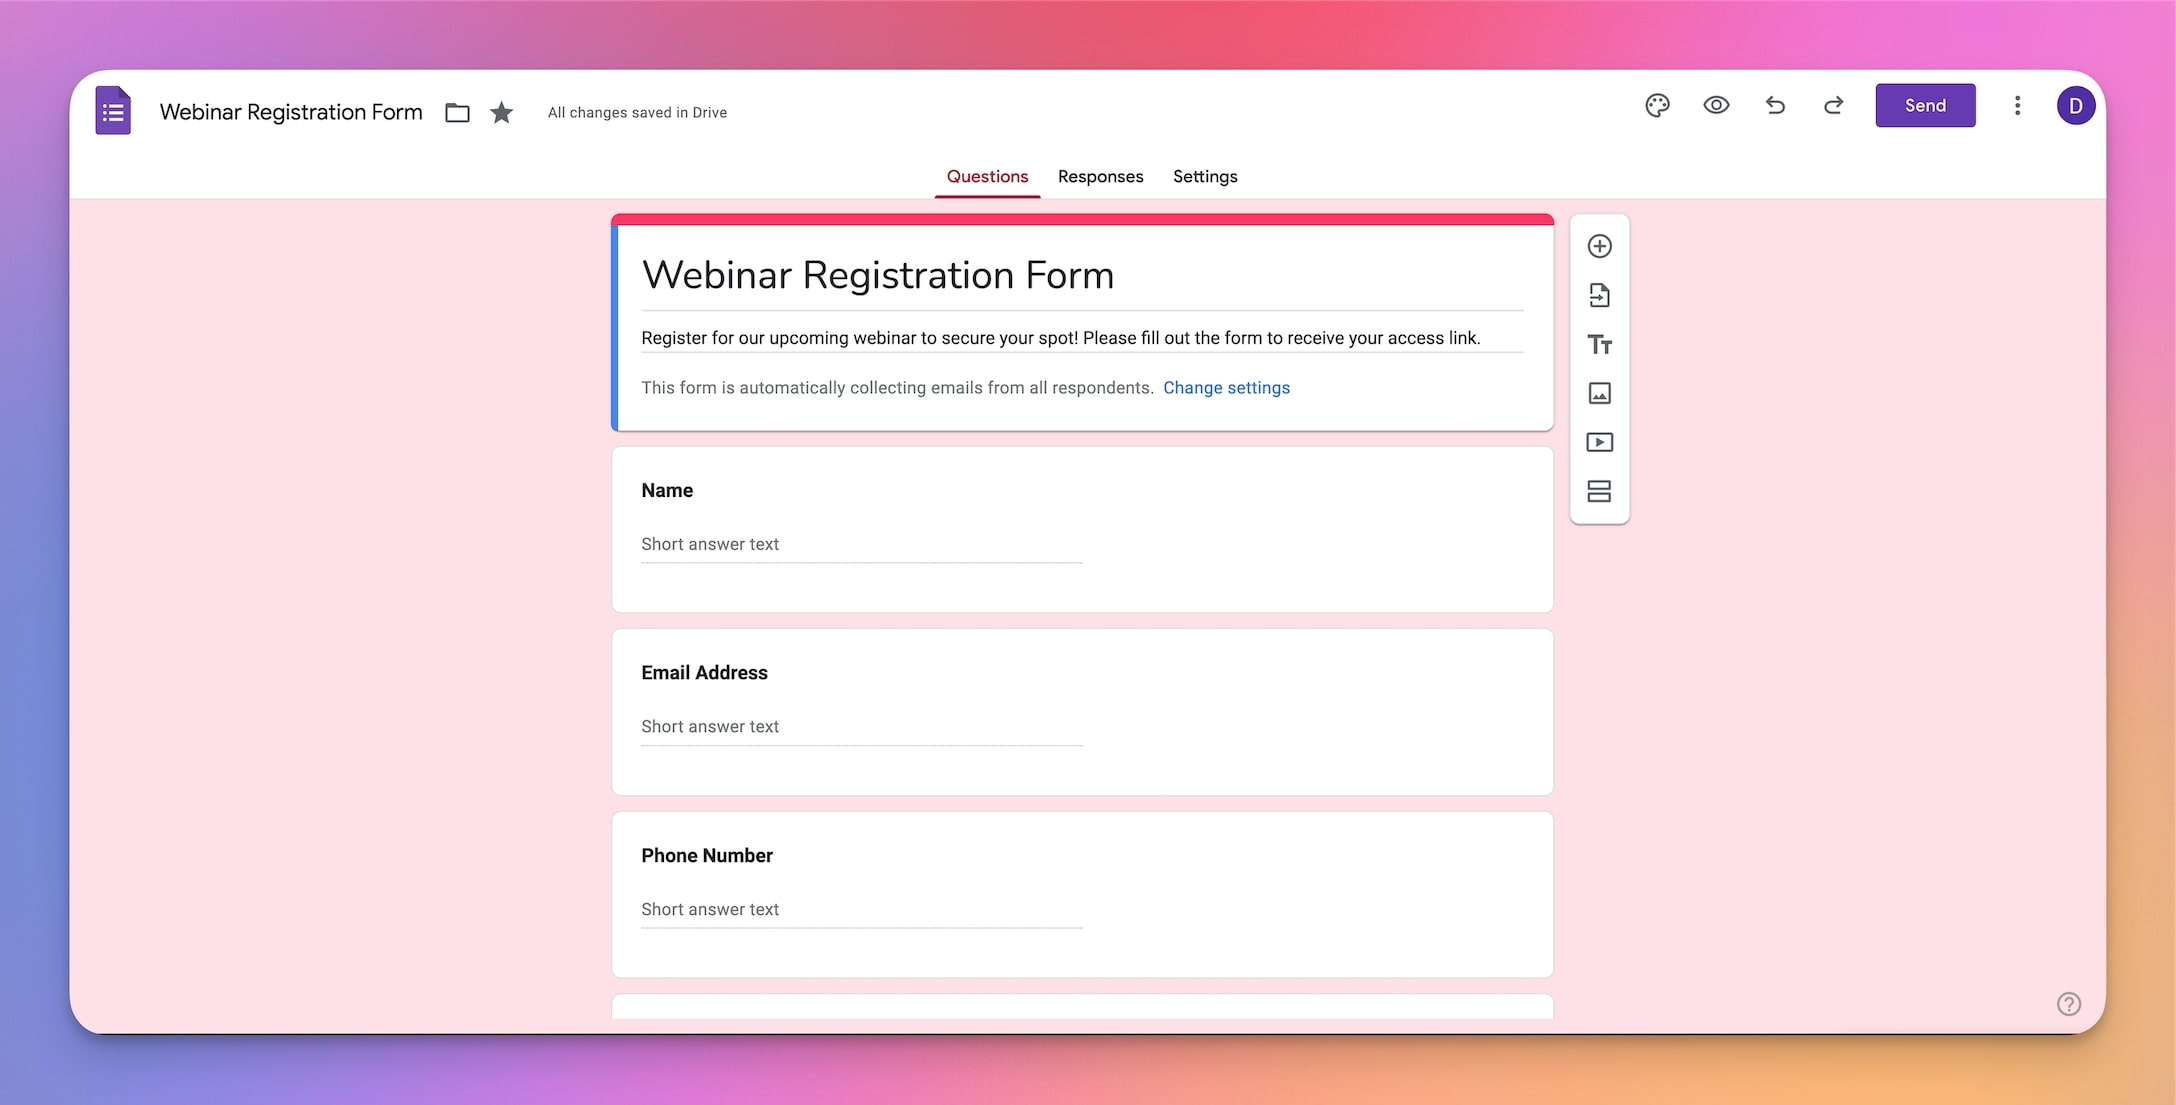
Our form will contain several standard fields that will help us capture structured responses:
Name: To capture the participant's full name.
Email Address: To send confirmations and follow-up communications.
Phone Number: For direct contact and last-minute updates.
Organization/Company: To identify affiliations or business interests.
Job Title: To tailor content or networking opportunities during the webinar.
Special Requirements: A text field for any special accommodations.
Of course, you can modify the form and add/remove fields to suit your needs. Moving on.
Step 3: Generate Your Automation
Once the form is ready, it’s time to build a basic structure for the automation flow.
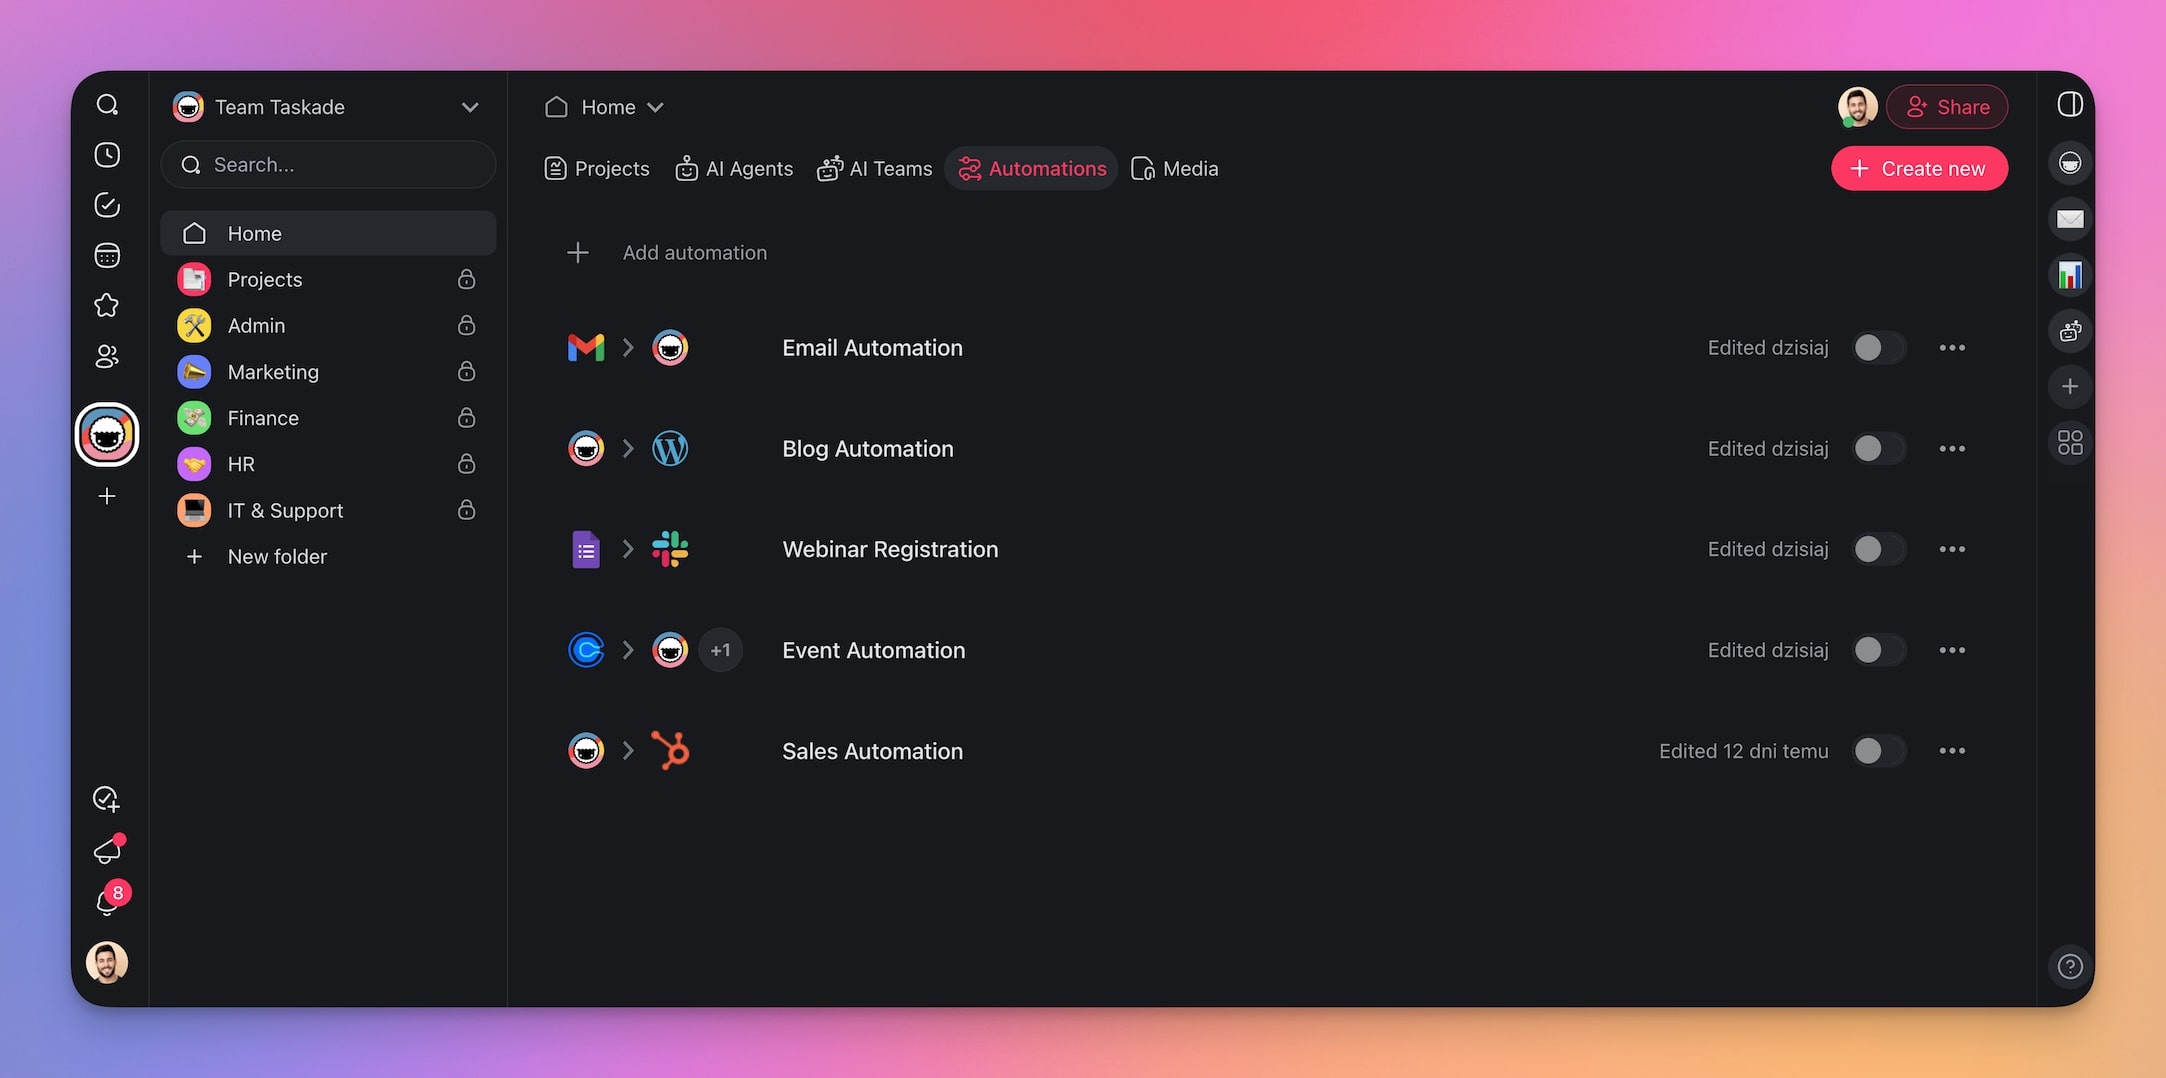
To do that, go to the Automations tab in your workspace.
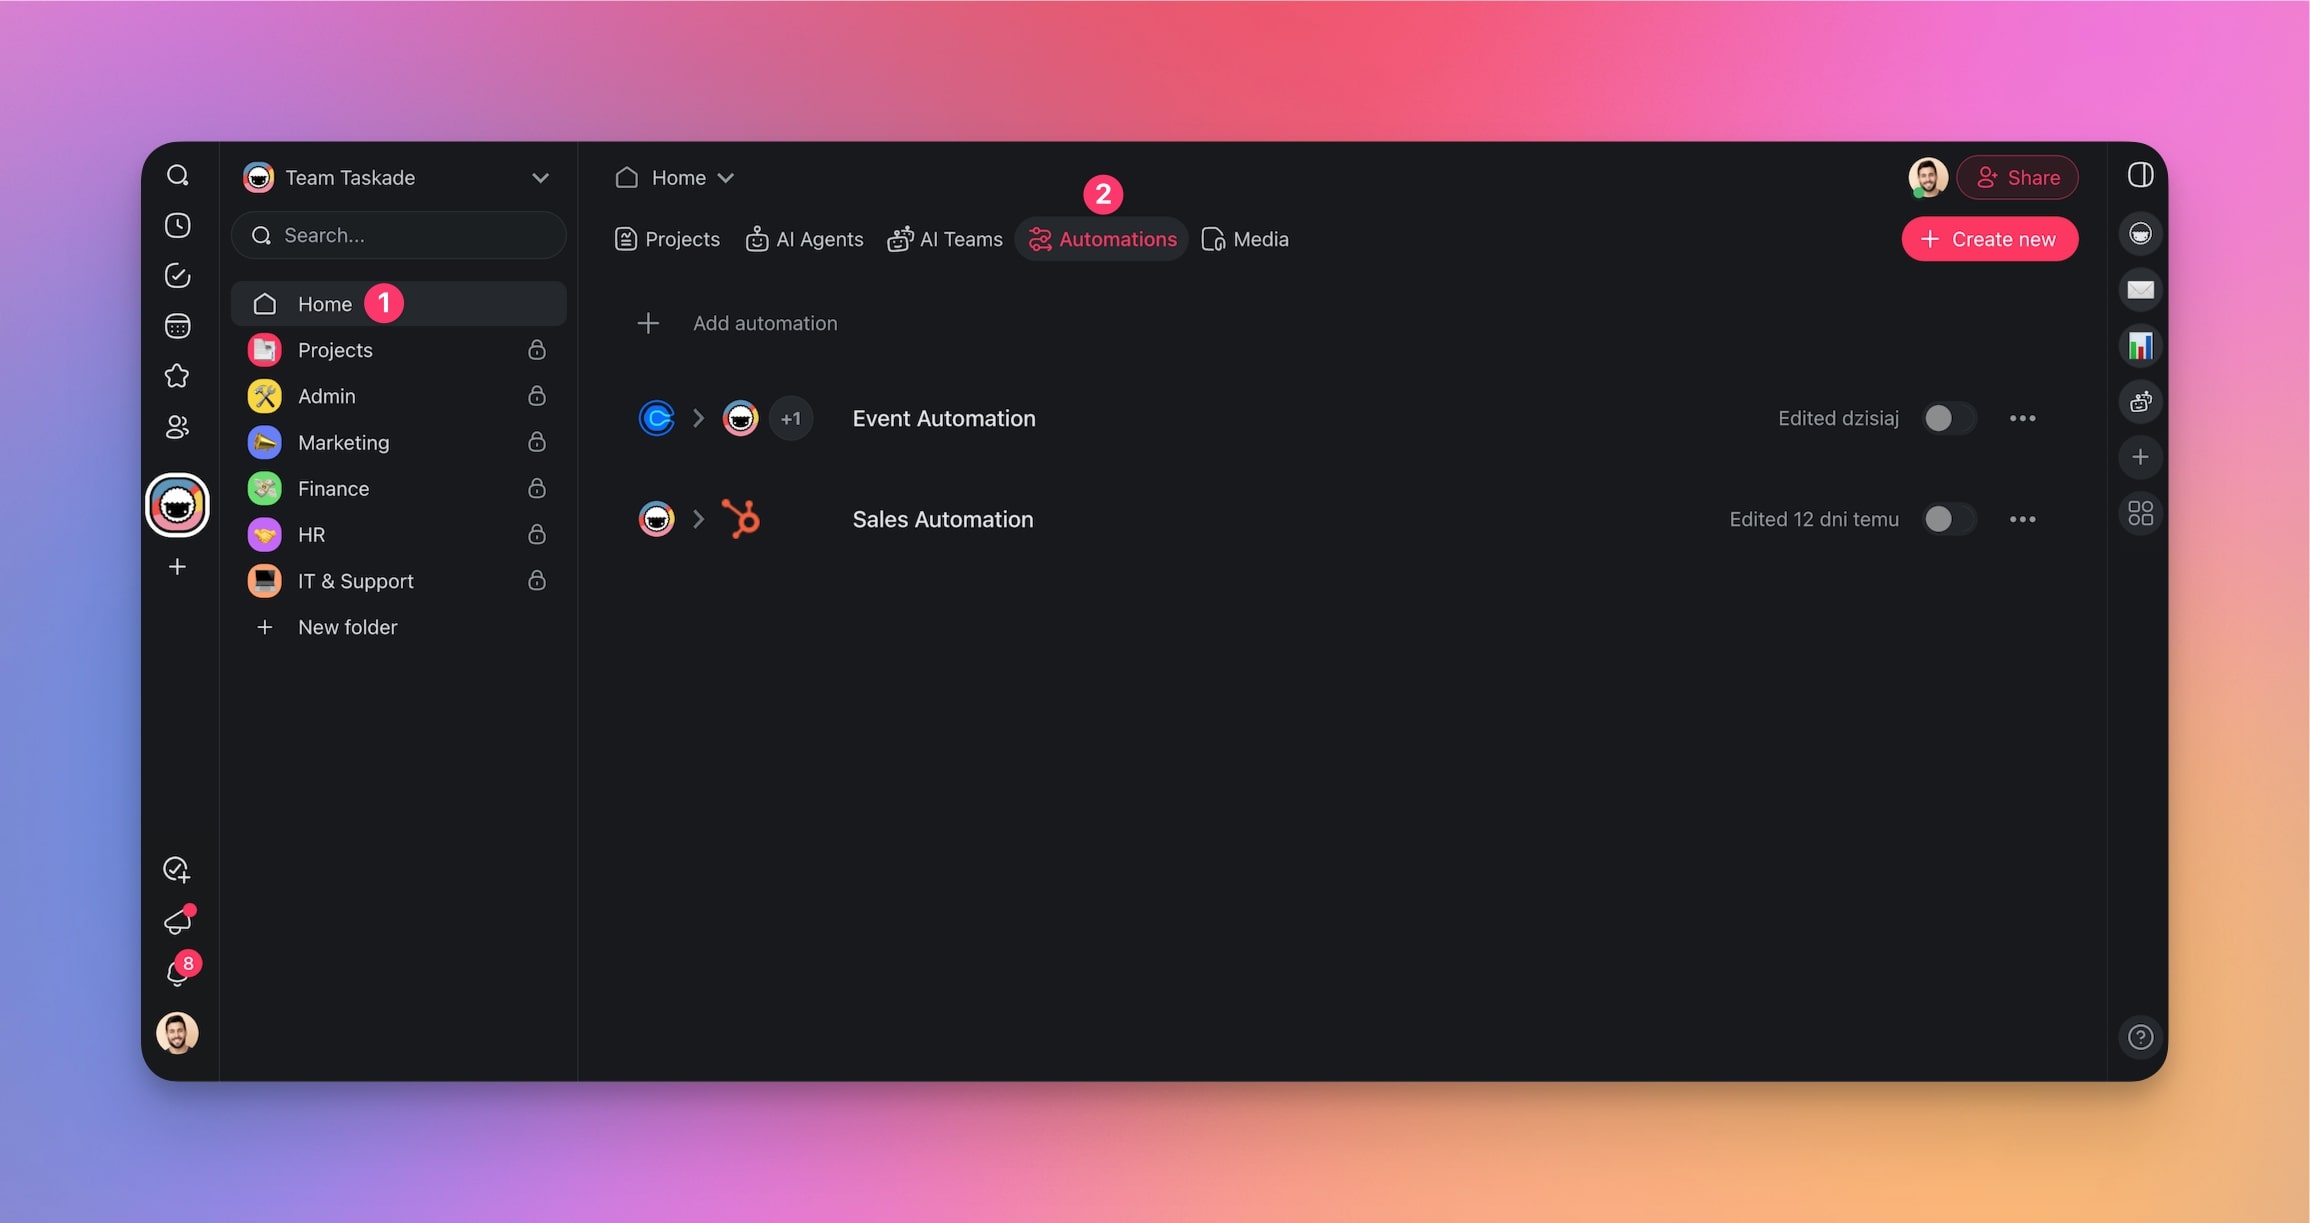
Next, click ➕ Add automation and select the Generate With AI tile.
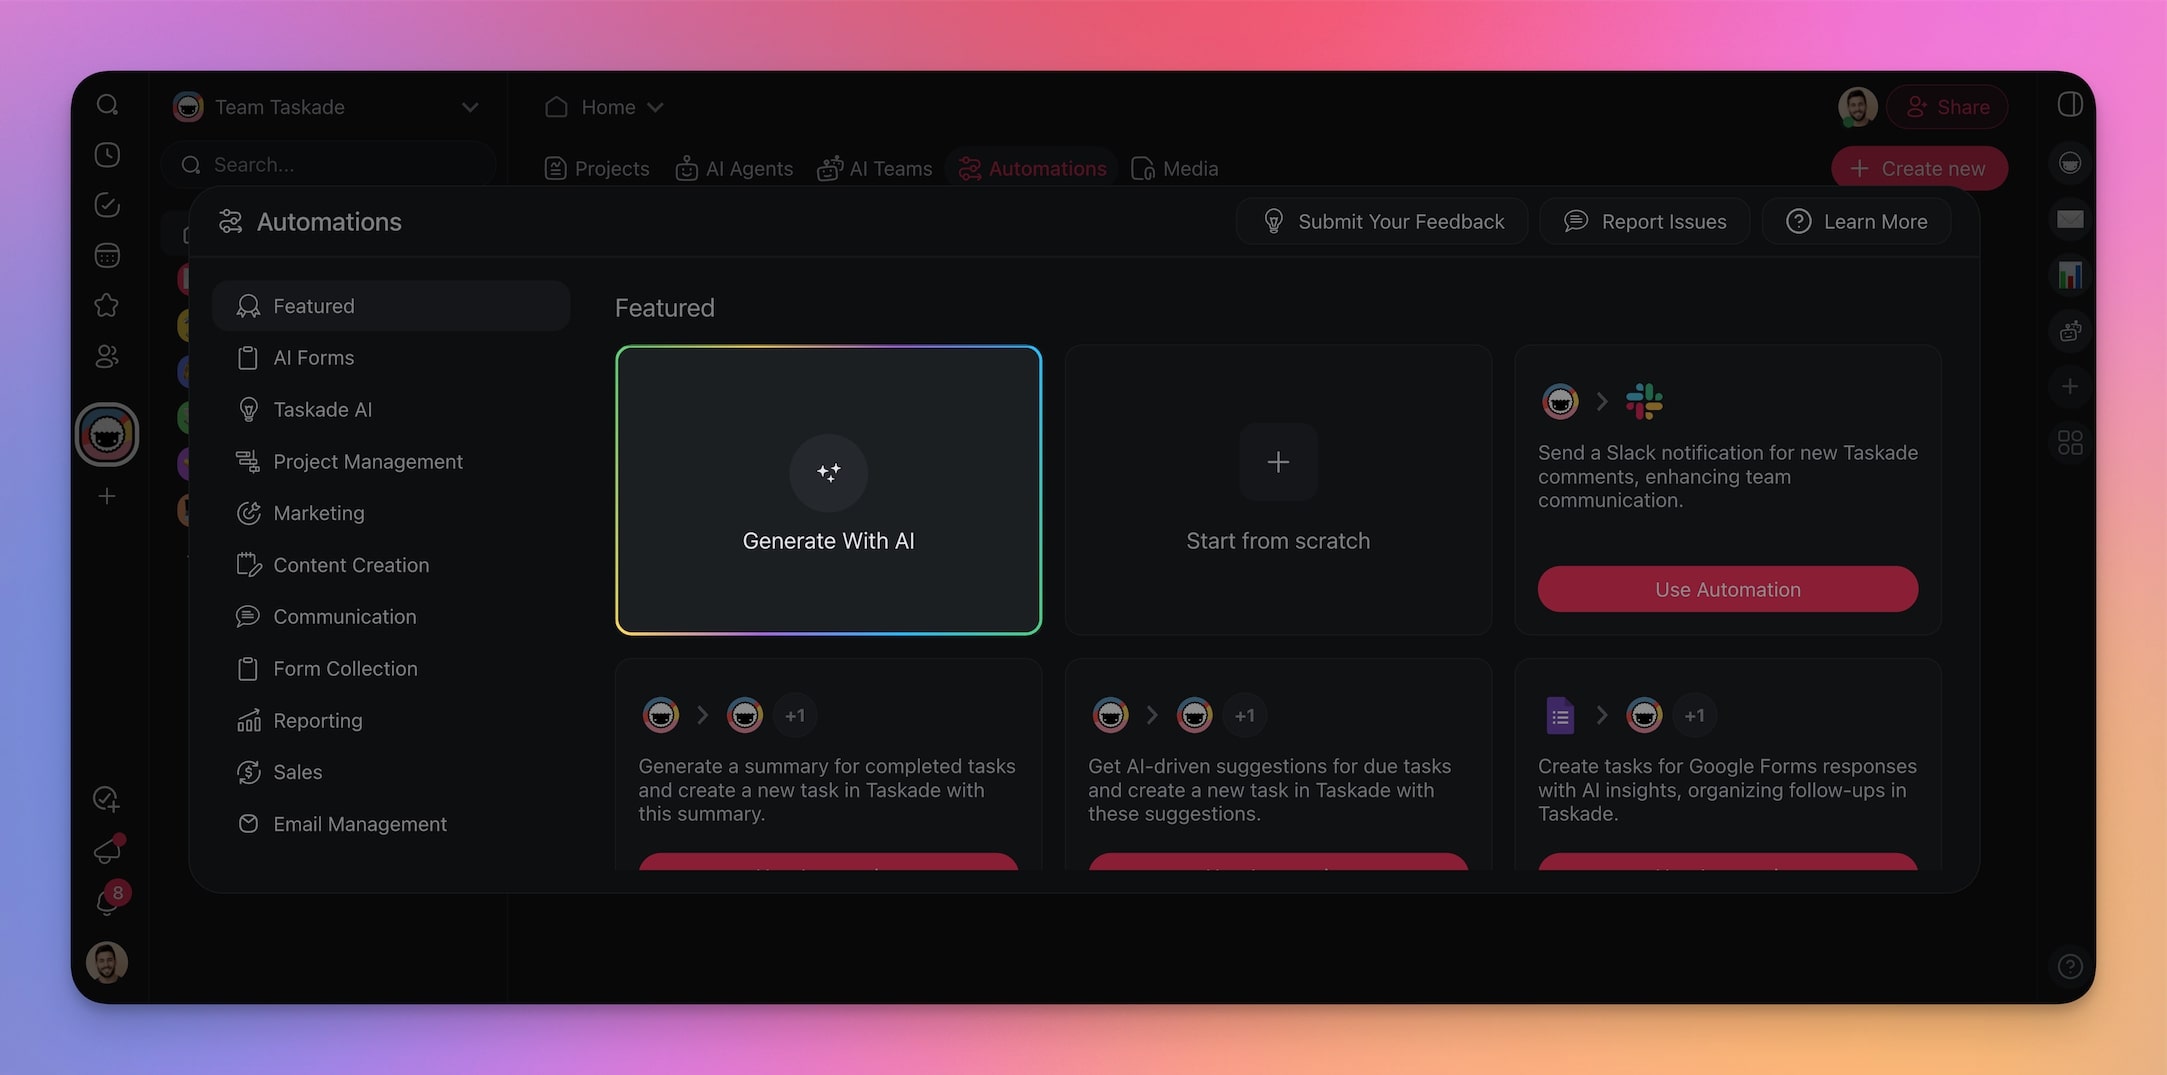
Next, let's describe what we want to accomplish in the prompt box. You can use the following prompt:
"Create an automation that links Google Forms to Slack to manage webinar registrations. When someone submits a form, send a notification to a Slack channel with their details."
💡 Remember: If you want to specify additional requirements (tools, form fields, etc.), simply mention them in the prompt. You can always edit and update each automation step later on.
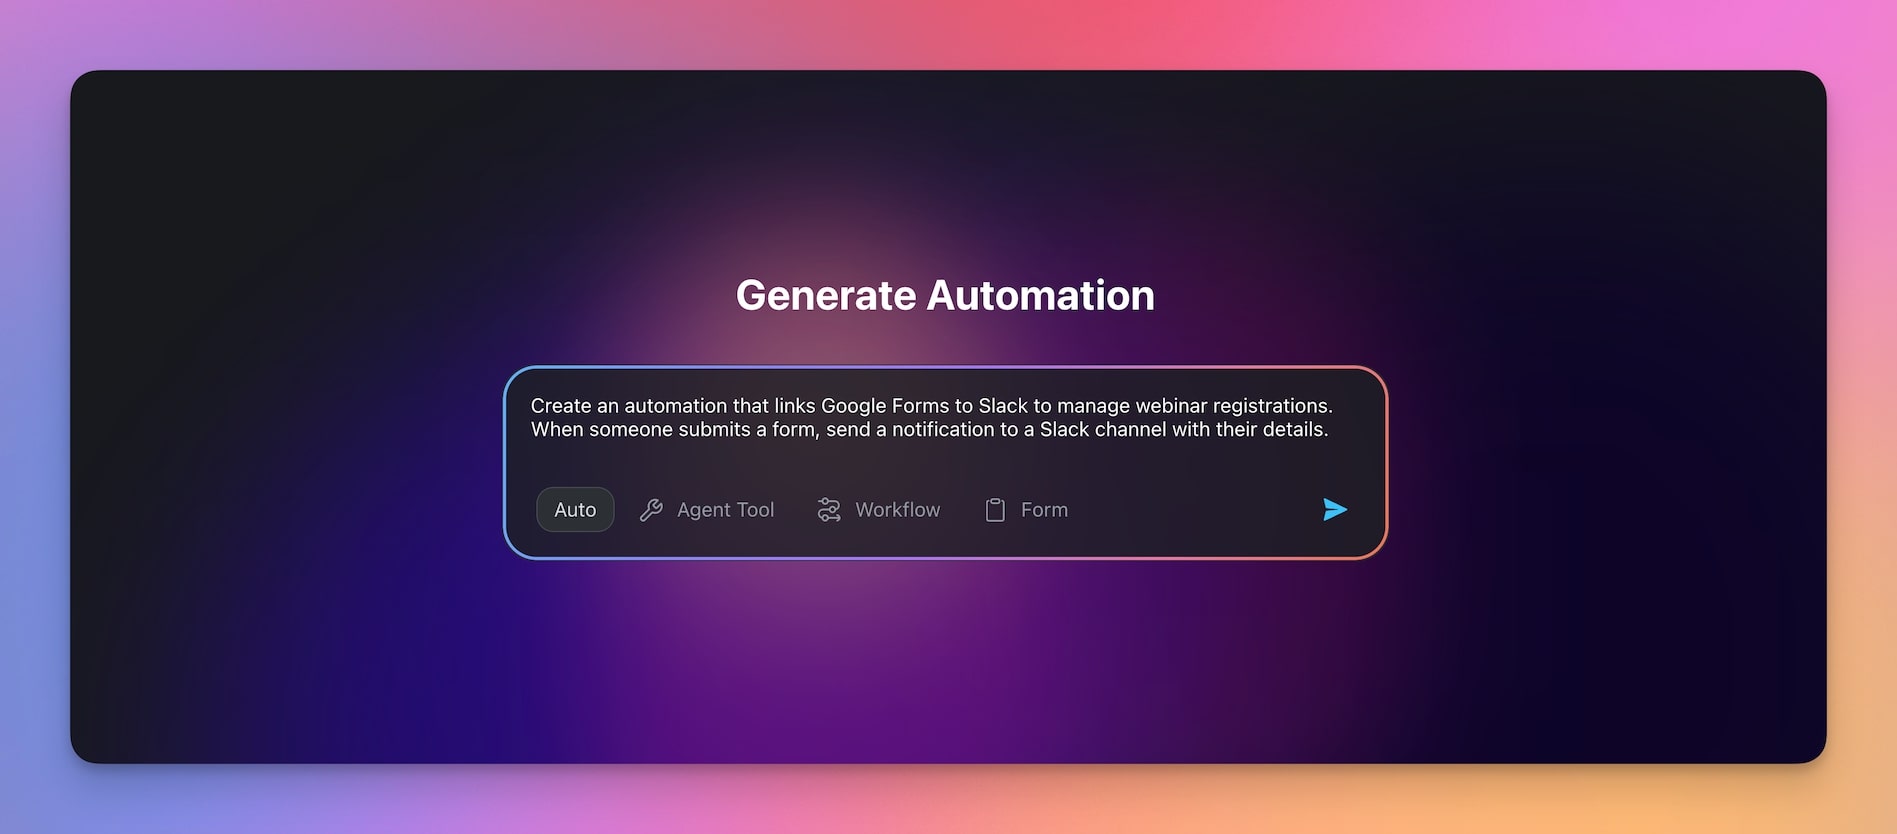
When done, press Enter and wait for the Automation Generator to finish.
Click Create Automation to create the flow.
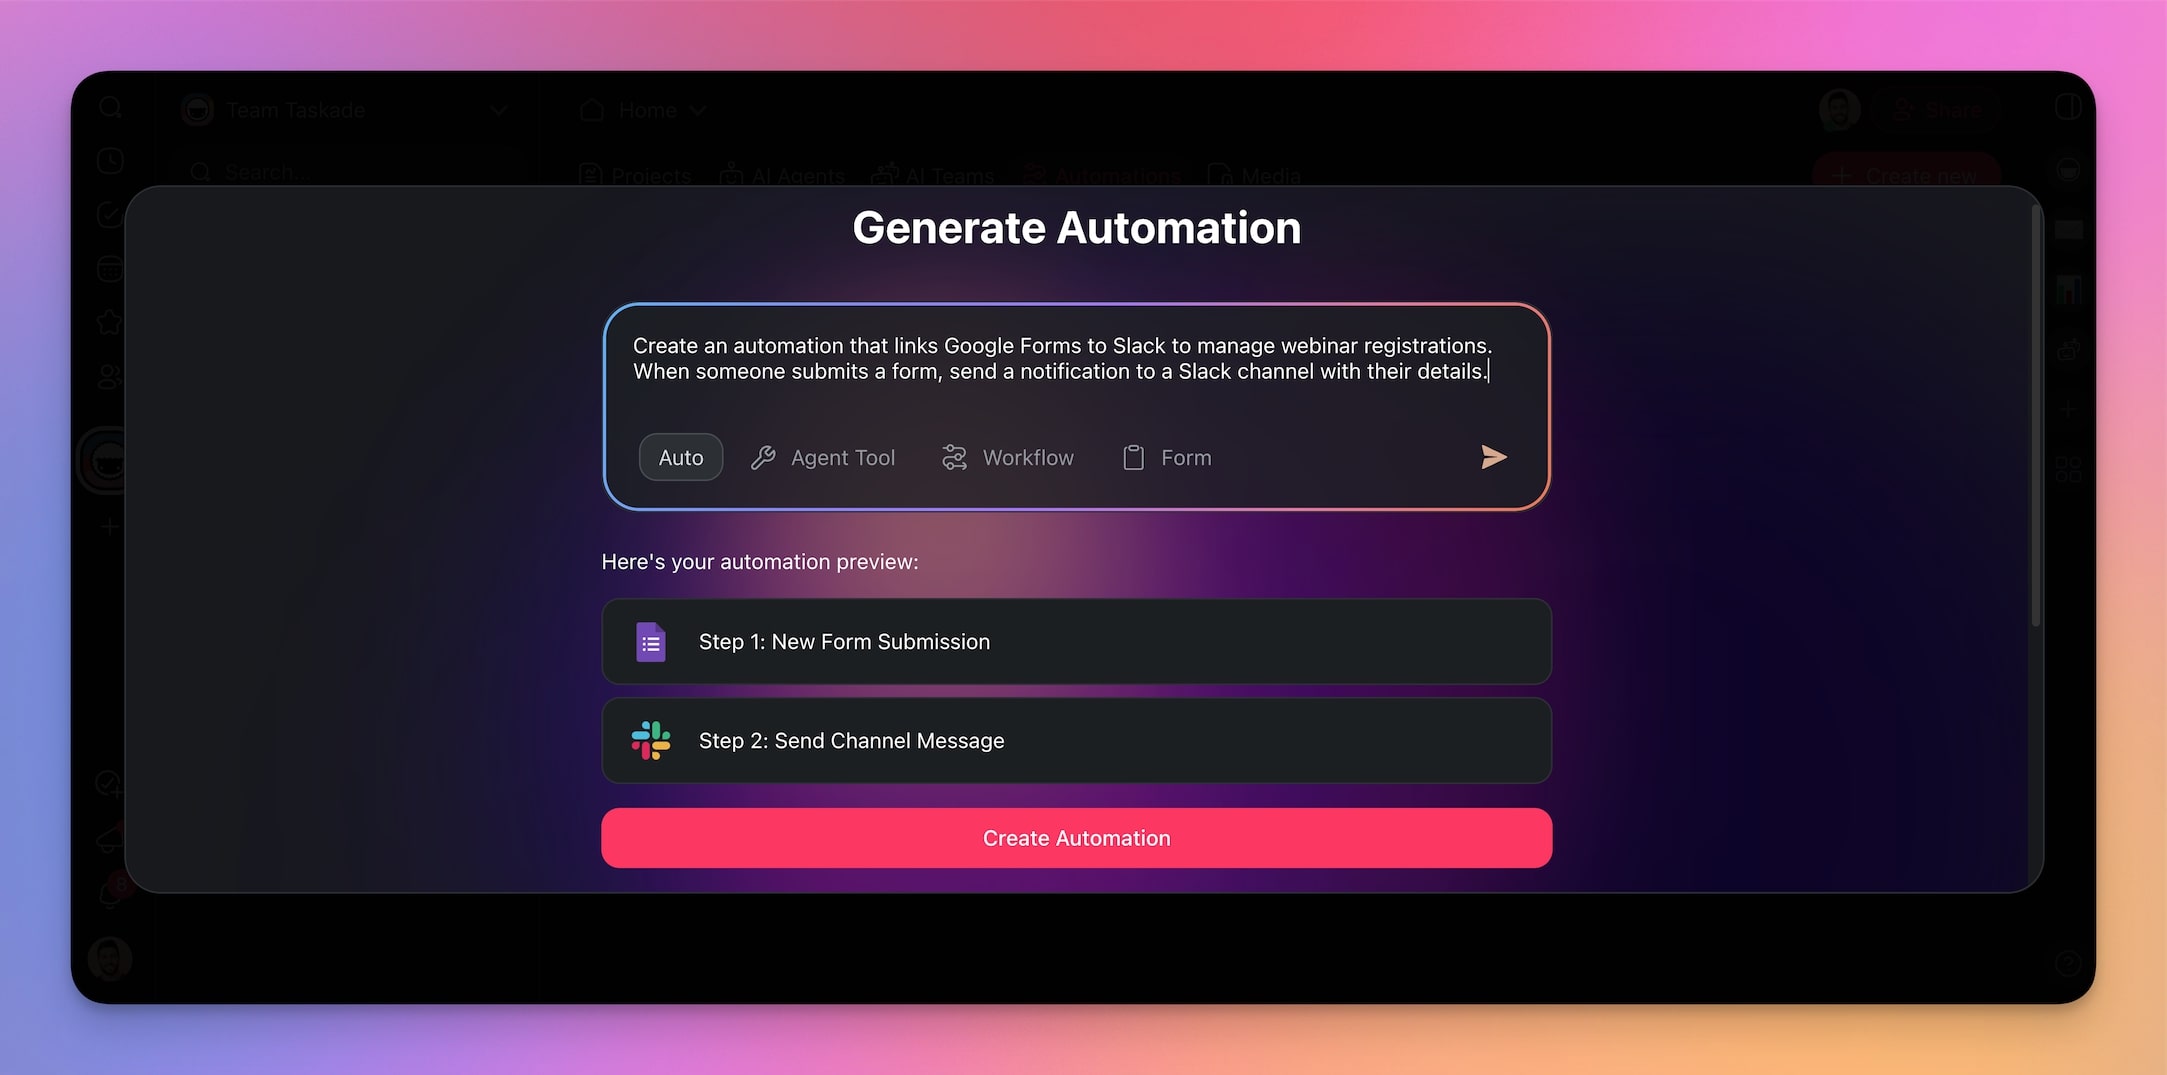
Step 4: Connect Google Forms to Taskade
With the basic steps in place, connect and configure the Google Forms Taskade integration.
Select the Google Forms trigger, click Connect in the right sidebar, and follow the instructions.
Finally, choose the form you want to use from the drop-down list.
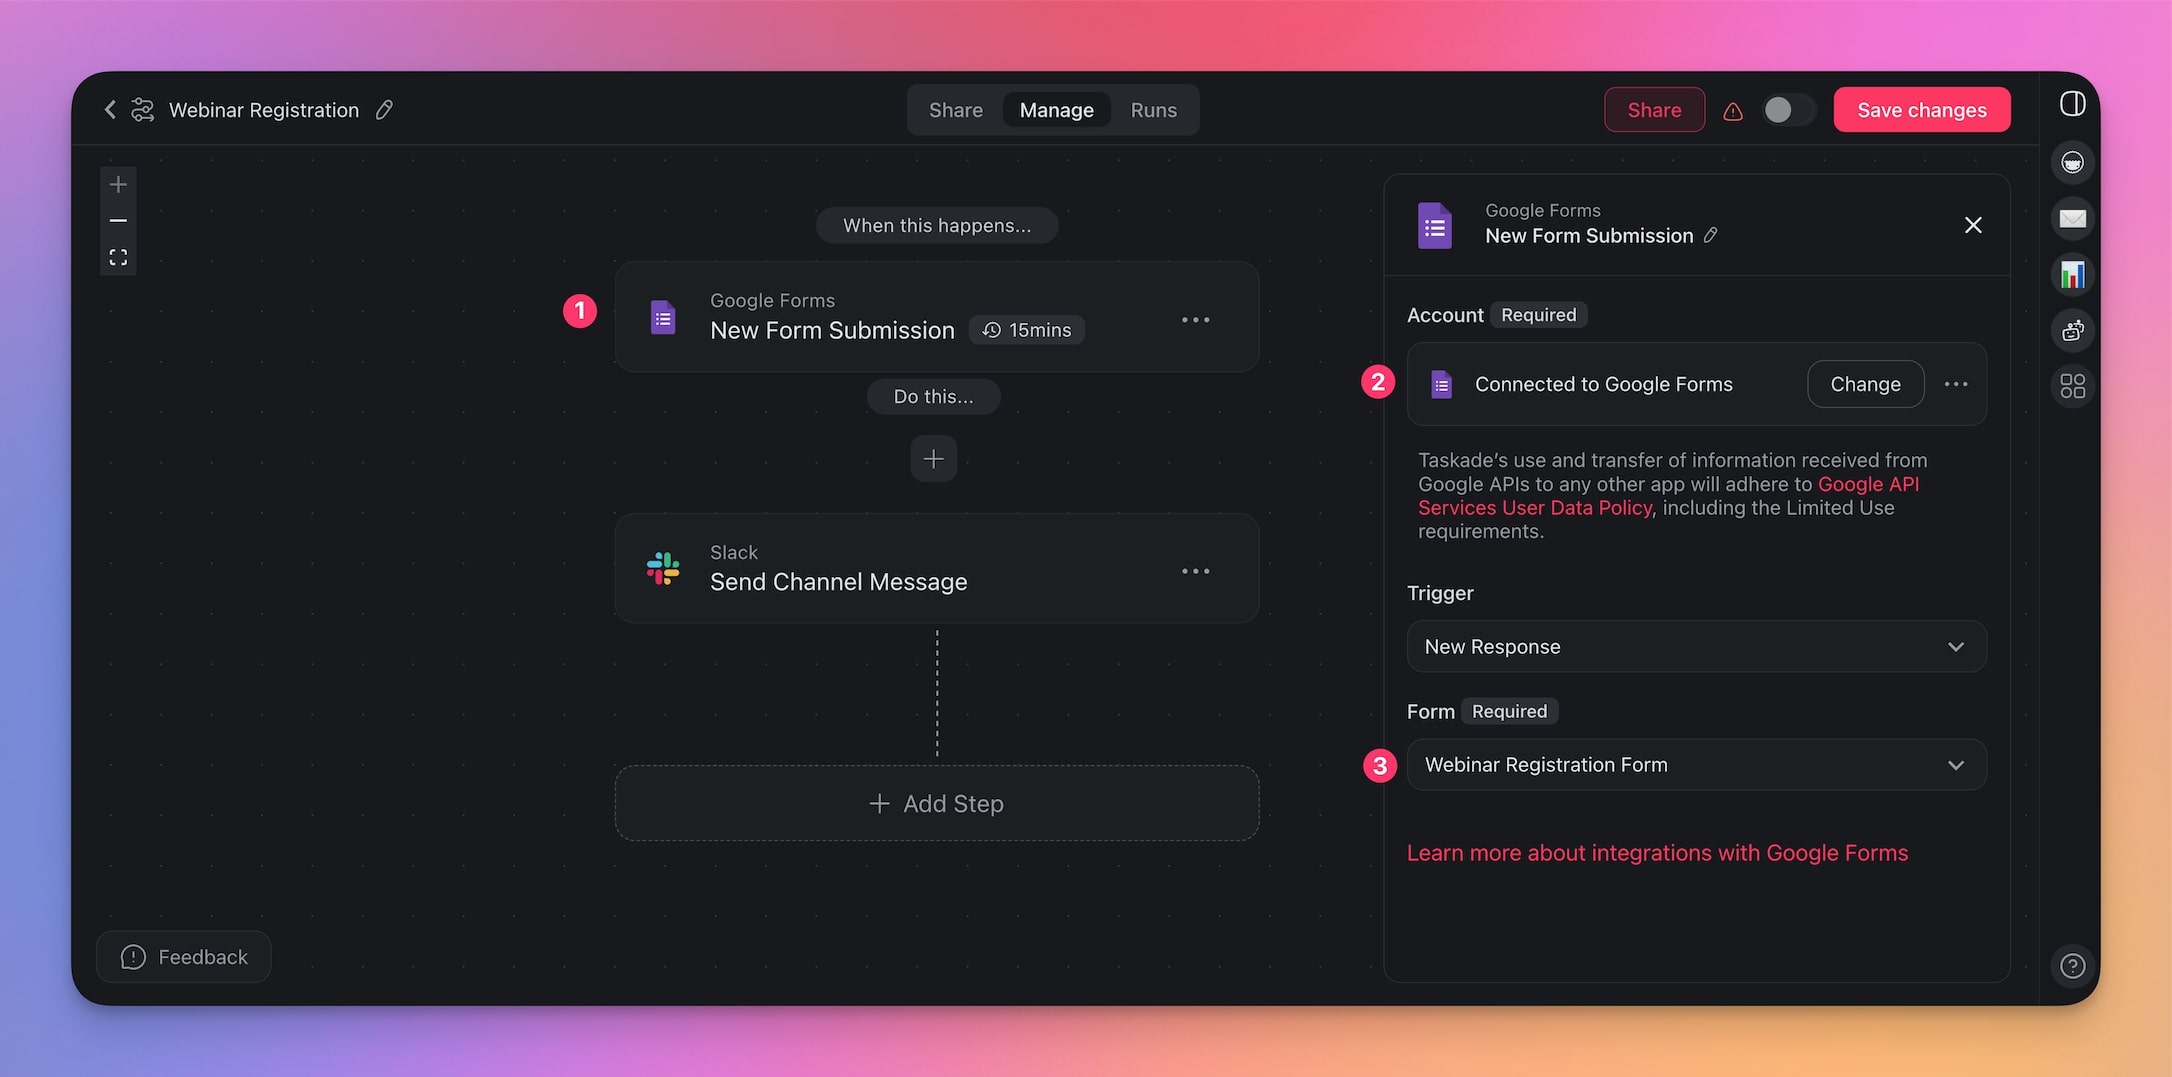
Finally, choose the form you want to use from the drop-down list.
Step 4: Configure the Slack Integration in Taskade
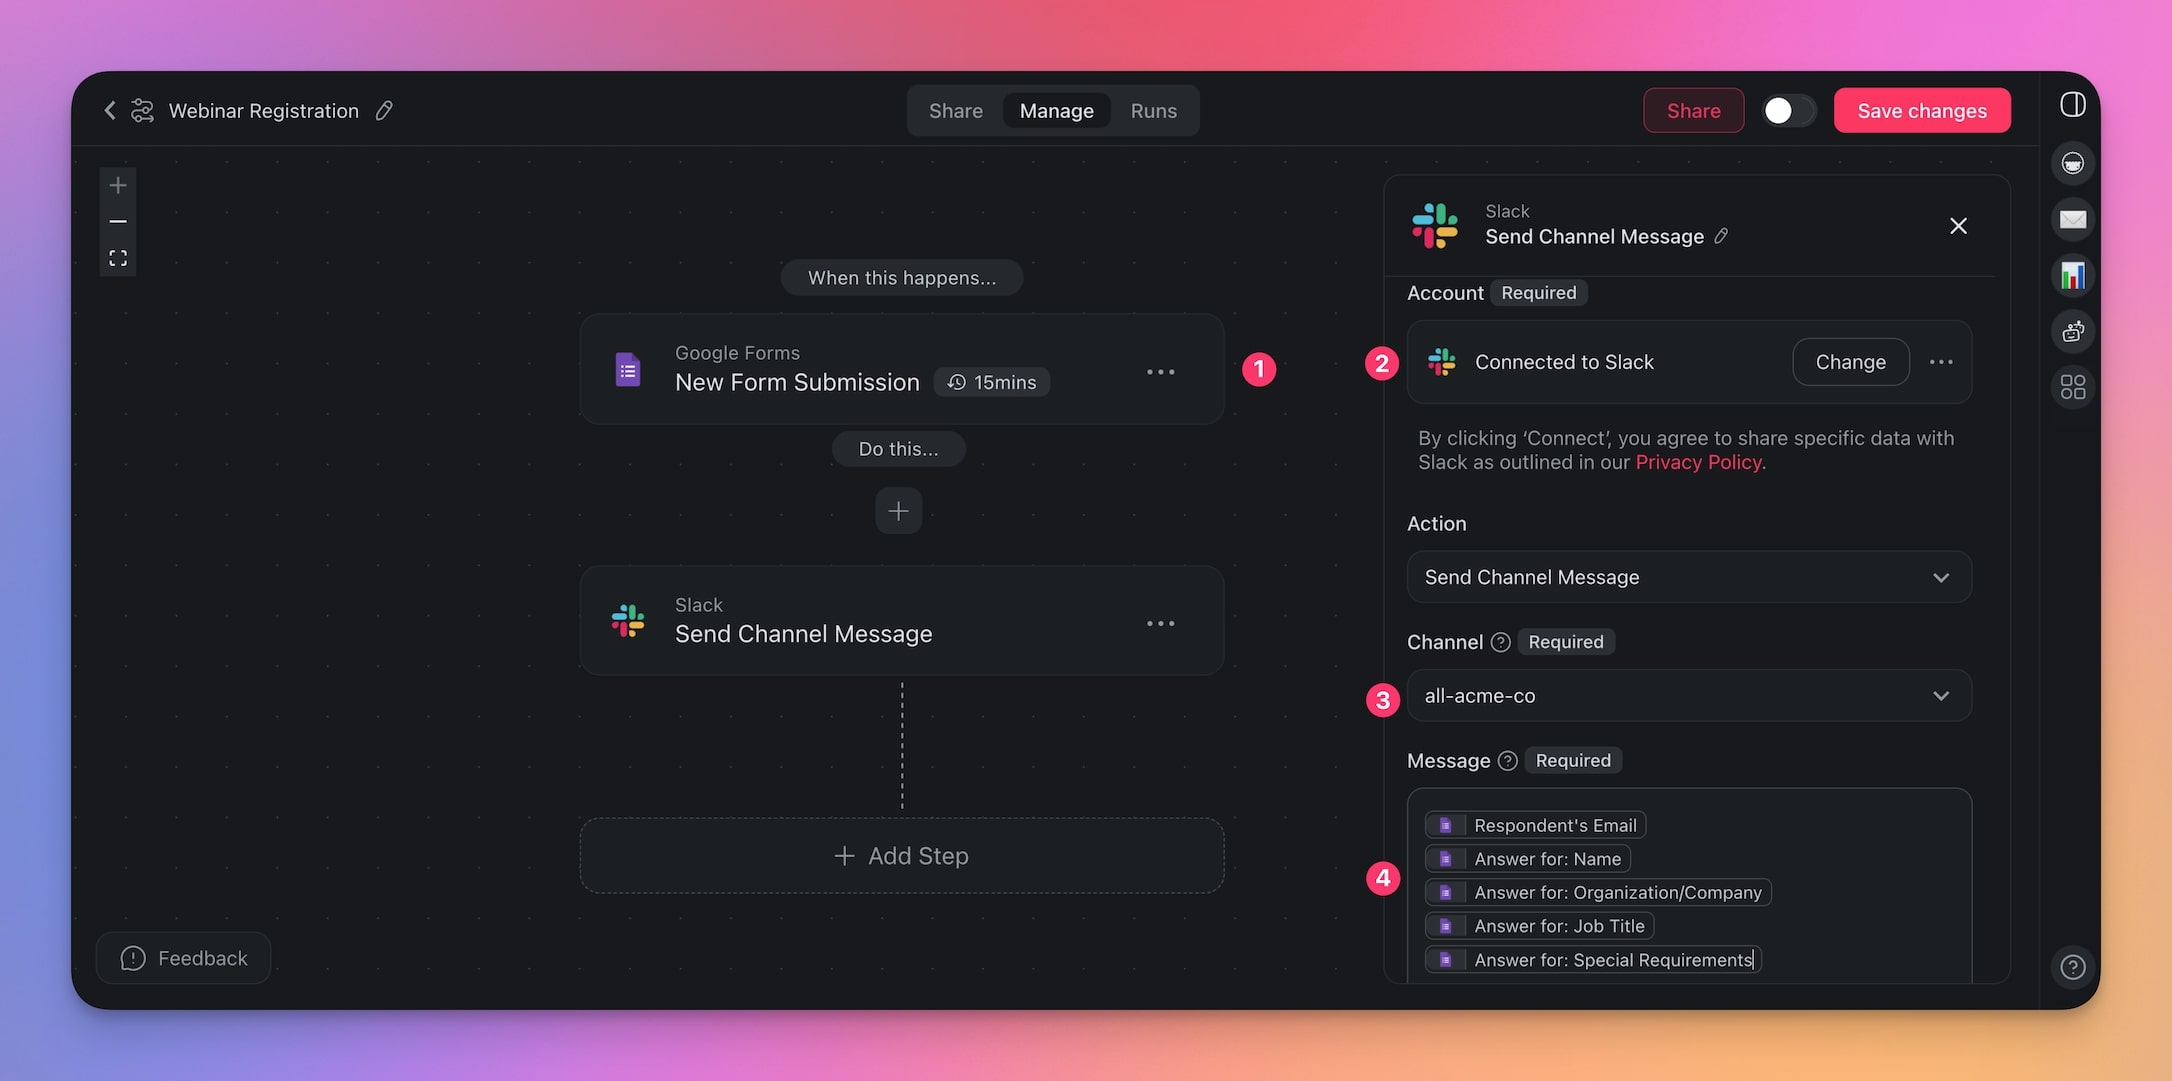
Next, we need to decide which part of the responses will be turned into Slack notifications.
Choose the Slack action, connect your Slack Taskade integration, and configure the output.
Choose the channel and format the message.
Step 5: Test and Run the Integration
The automation is ready. Let's test it.
First, open your Google form and click the little eye icon (right at the top) to preview it.
This shows you exactly how the form will look to others.
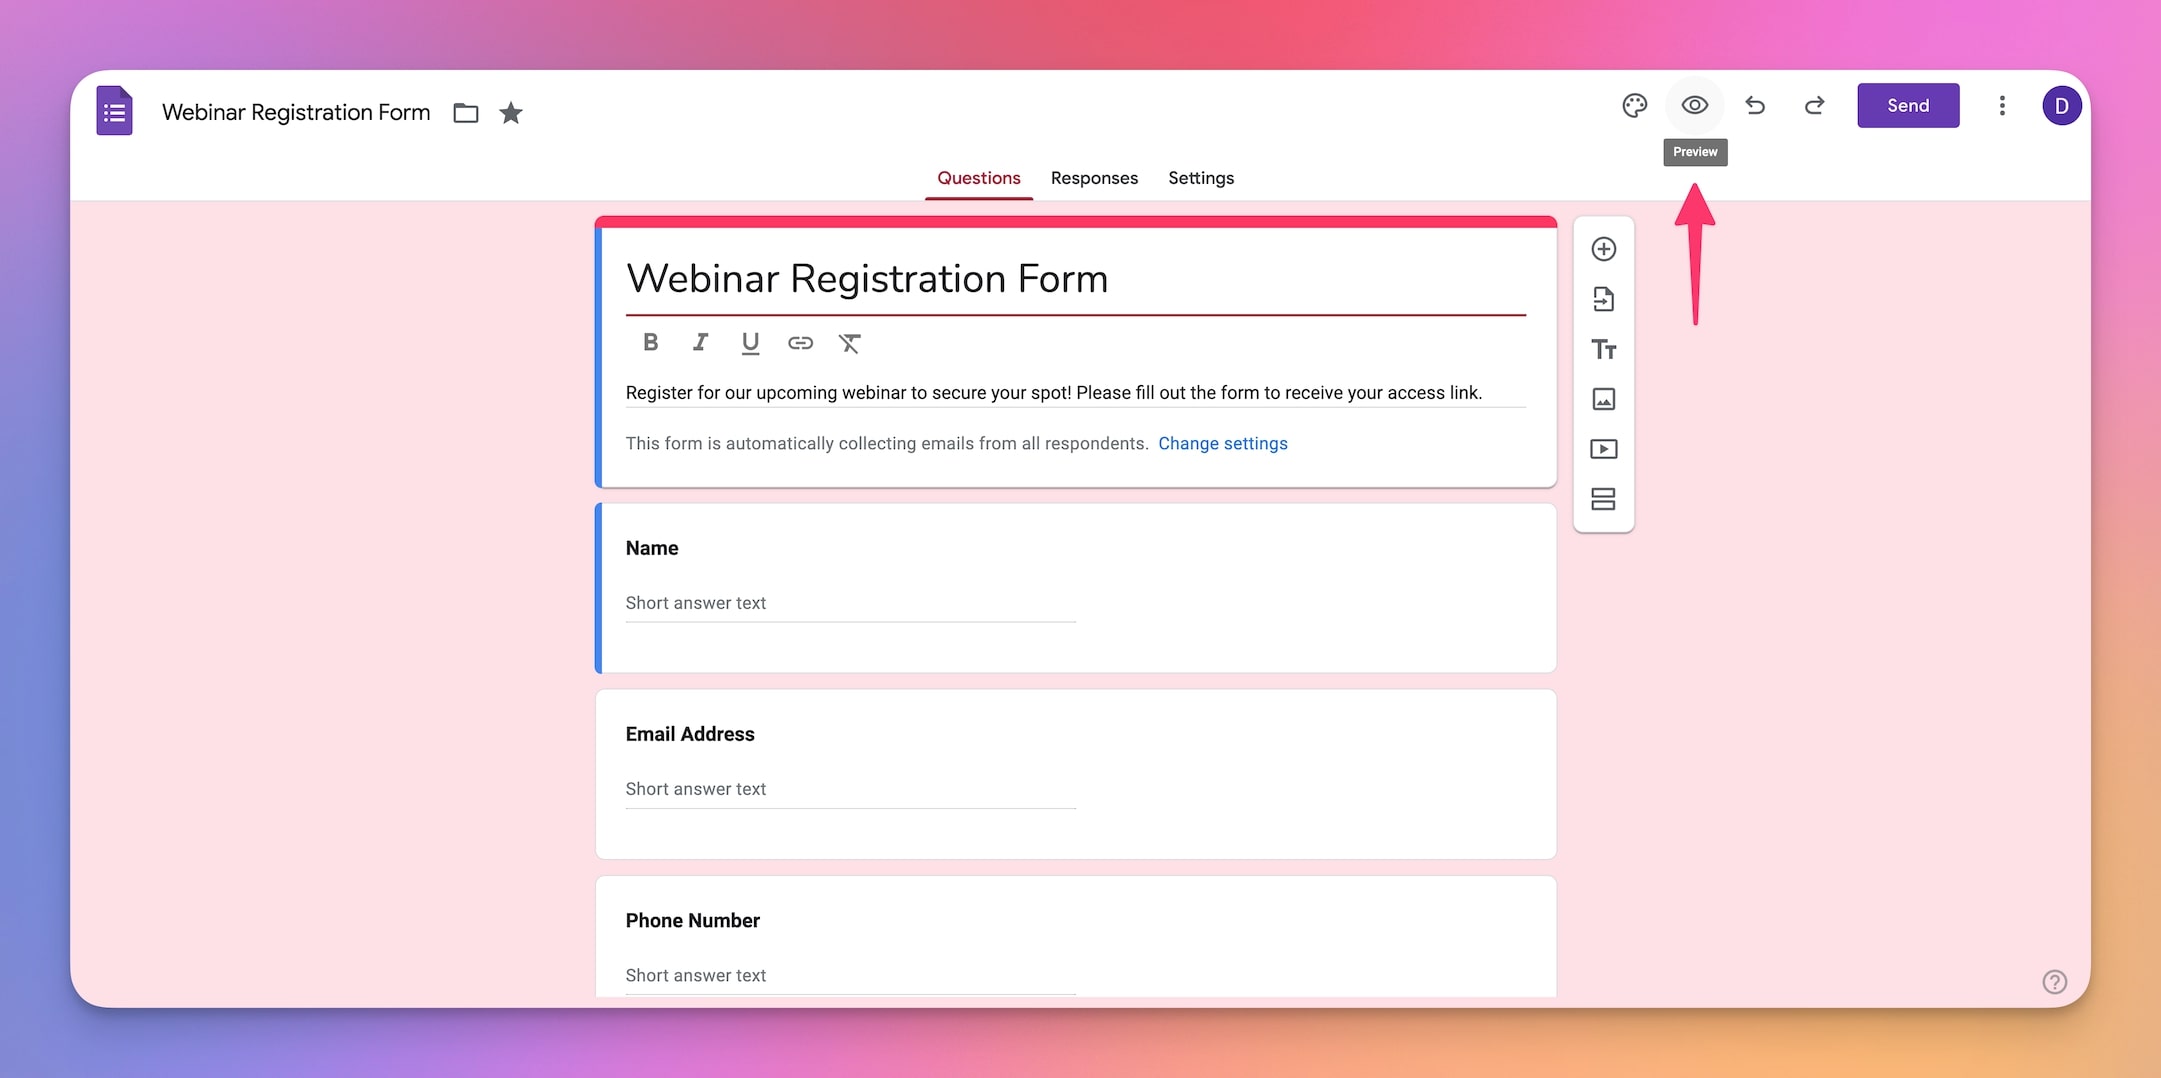
Go ahead and fill out the form with sample responses. Test everything — each type of question (multiple choice, short answer, checkboxes, etc.). Make sure that the required questions can’t be skipped.
When done, you should see your Google Forms responses in Slack.
💡 Remember: The Google Forms trigger checks for new data every 15 minutes.
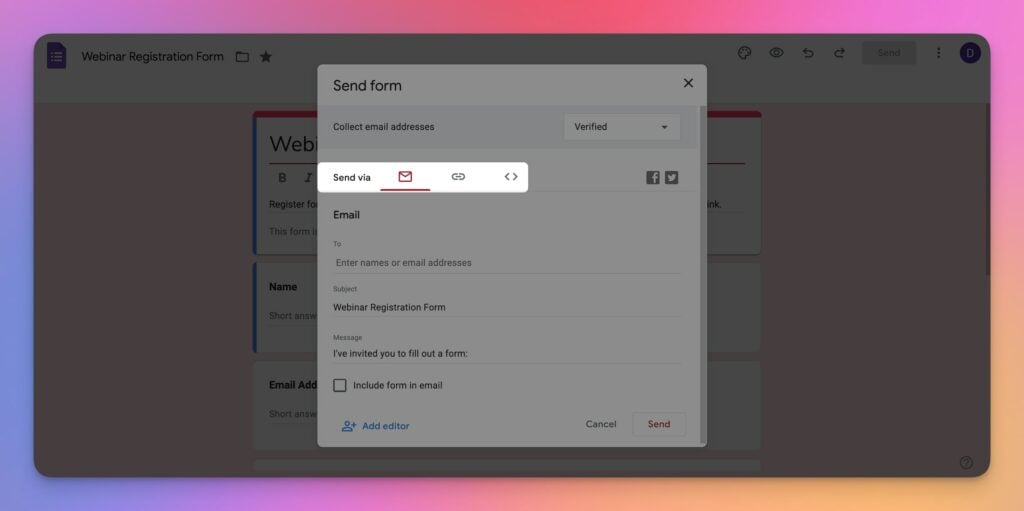
If the form works properly, you can embed it on your website or share across different channels. Every time somebody fills the form, you will receive real-time Slack alerts from Google Forms.
Remember: The Google Forms trigger checks for new data every 15 minutes.
And that's it! 🎉
🦾 Advanced Tips for Automations in Taskade
Before you fall into the automation rabbit hole, there are a few tips & tricks you should try.
Use Additional Workflows
Once you've got your basic automation running smoothly, it's time to level up.
For example, you can automatically assign tasks to team members in Taskade based on form submissions. When a webinar registration comes through, the Assign Task action can match incoming questions, inquiries, and any special requests to team members who can address them.
Want to streamline how you manage registration data? Feed the incoming answers directly into a tracker inside Taskade and update it in real time with the Update Custom Fields action.
![]()
Make the most of the available actions & triggers to refine and develop your automation.
Manage Multiple Forms
Running multiple events? Set up multiple forms and corresponding automations to manage it all.
For example, you can create separate forms for different events like summits, hackathons, or industry expos. Each form can have its own automation flow to ensure that everything runs smoothly.
Or you might want to automate the distribution of event schedules. Each form submission can trigger an email that sends attendees the relevant agenda to ensure they have all the information they need.
Mix and match to build the setup that works for you.
Leverage Taskade's AI Forms
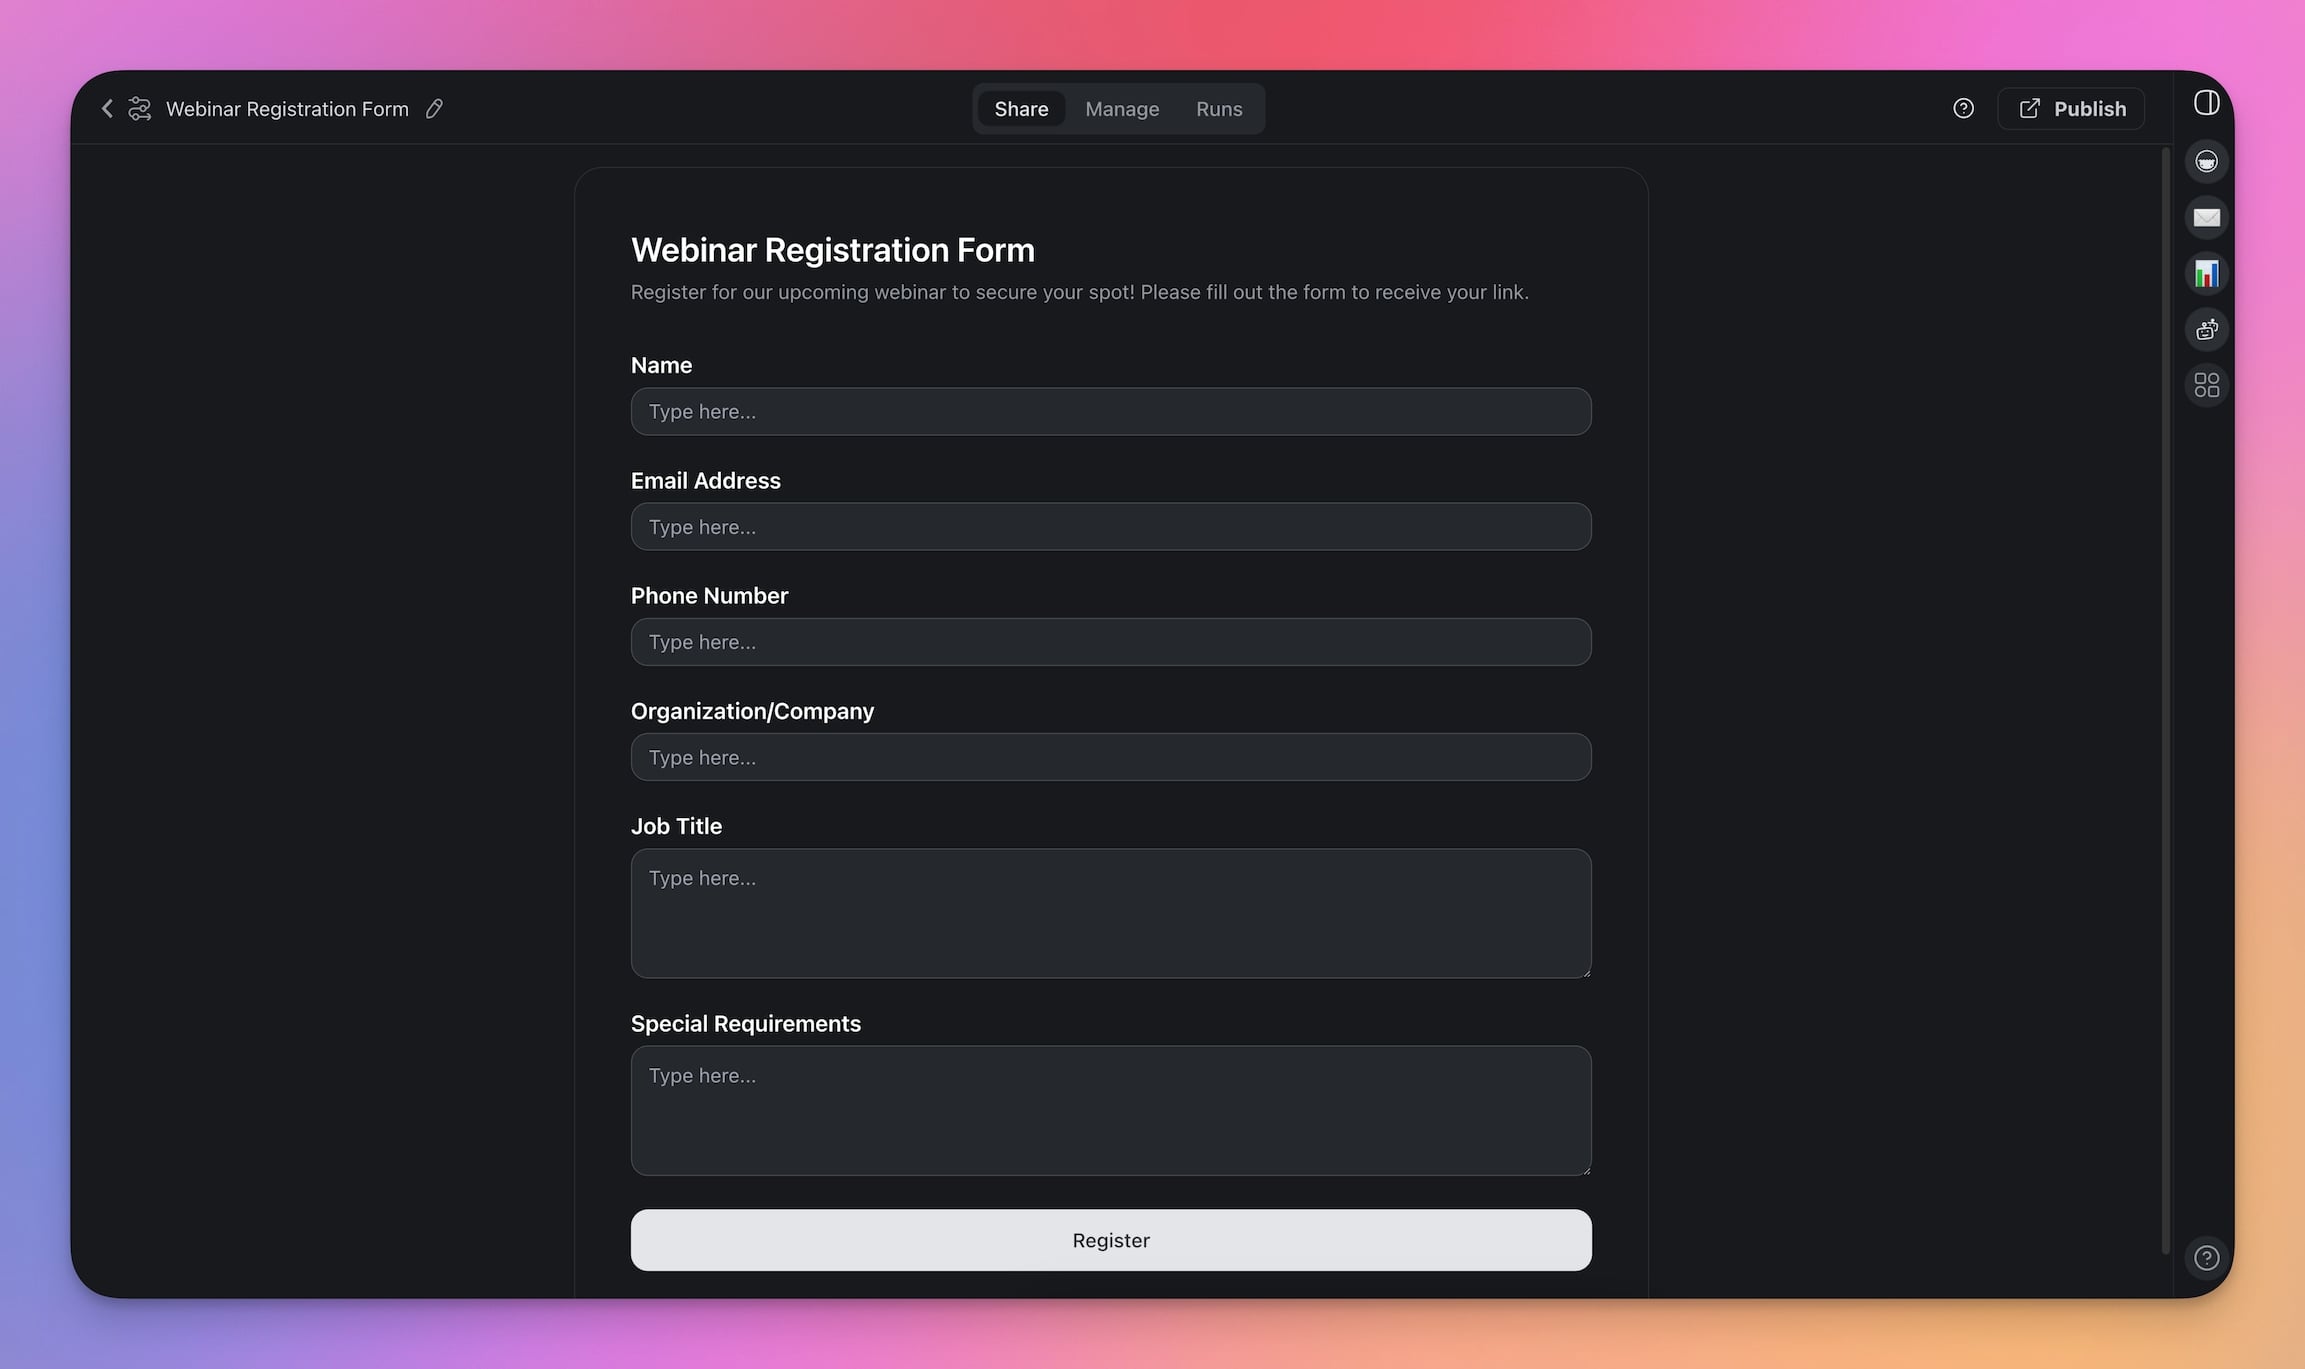
Did you know you can use the Form Trigger in Taskade to speed things up? Taskade Forms allow you to streamline data collection and automate workflows directly within your workspace.
To get started, simply go to your automation and choose the Form Trigger.
Next, specify the conditions for the trigger on the right. The form may include the same fields we used in our Google Form. You can even intake files and documents to capture additional information.
👋 Parting Words
Time to wrap this up!
You learned how to integrate Google Forms with Slack through Taskade's automations. You also know how to collect data from various sources and communicate it straight to your team more effectively.
But automating Slack notifications is just the beginning.
So, what's then next step?
Connect your automations to other tools and platforms, explore new use cases, and try other workflows. Experiment to find what works best for your team, and keep refining your processes.
So, what are you waiting for?
🪄 Sign up and build your first AI-powered automation!
