How to Create a Calendar in Excel
Excel is a powerful tool for crunching numbers. But it can also double as a fully-fledged calendar and planner, even if that means dumbing down its functionalit...
Excel is a powerful tool for crunching numbers. But it can also double as a fully-fledged calendar and planner, even if that means dumbing down its functionality a bit. In this article, you’ll learn how to make a calendar in Excel in three simple steps.
So, without further ado, let's dive in. 👇
🤔 What Is a Calendar in Excel?
A calendar in Excel lets you do pretty much what a regular calendar does:
👩⚕️ Schedule meetings and appointments.
✔️ Keep track of deadlines and important dates.
🎯 Set daily, weekly, and monthly goals.
🟢 Check your availability at a glance.
🗓️ Plan ahead and prepare for upcoming events.
Of course, there are also a few other gimmicks that come with the spreadsheet pedigree.
You can customize each and every worksheet cell to your heart’s content. Tweak one of the dozens of formatting options or apply conditional formatting and watch cells change appearance based on their contents. We’re not saying that you should, but it’s possible.
The options are limitless, and for our taste, a bit overwhelming.

Since we don't have the time (or patience) for all that, let's stick to the basics.
🏗️ How to Make a Calendar in Excel in 3 Steps
1. Use a Template or Start from Scratch
When you first open Excel, you have two choices. You can create a blank workbook and format the calendar yourself or pick one of the available templates to speed up the process.
Choosing a ready-made framework is a no-brainer.
All you need to do is type “calendar” in the search bar in the top-right corner. There are dozens of pre-filled frameworks, each with unique styling and composition.
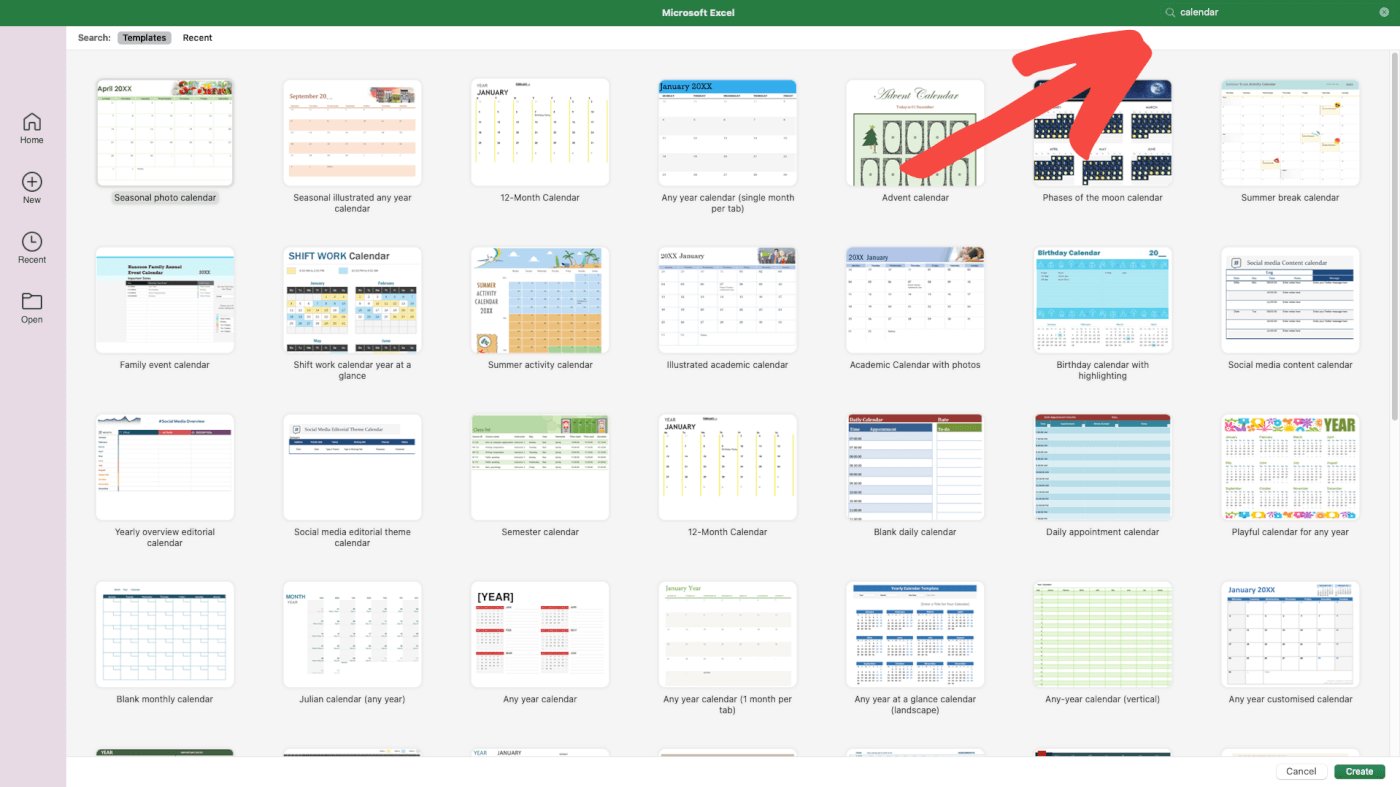
Using templates is faster, but it leaves you with limited customization options.
Let's try a more hands-on approach. 💪
Pick the Blank Workbook option from the list at the top.

[template]
Next, right-click “Sheet1” at the bottom, choose “Rename,” and type in the current month.

Great, moving on. 👉
2. Format Your Excel Calendar
Our spreadsheet is crisp and clear. But it doesn’t look anything like a monthly calendar.
Select seven columns at the top, from A to G and set Column Width to “20.”
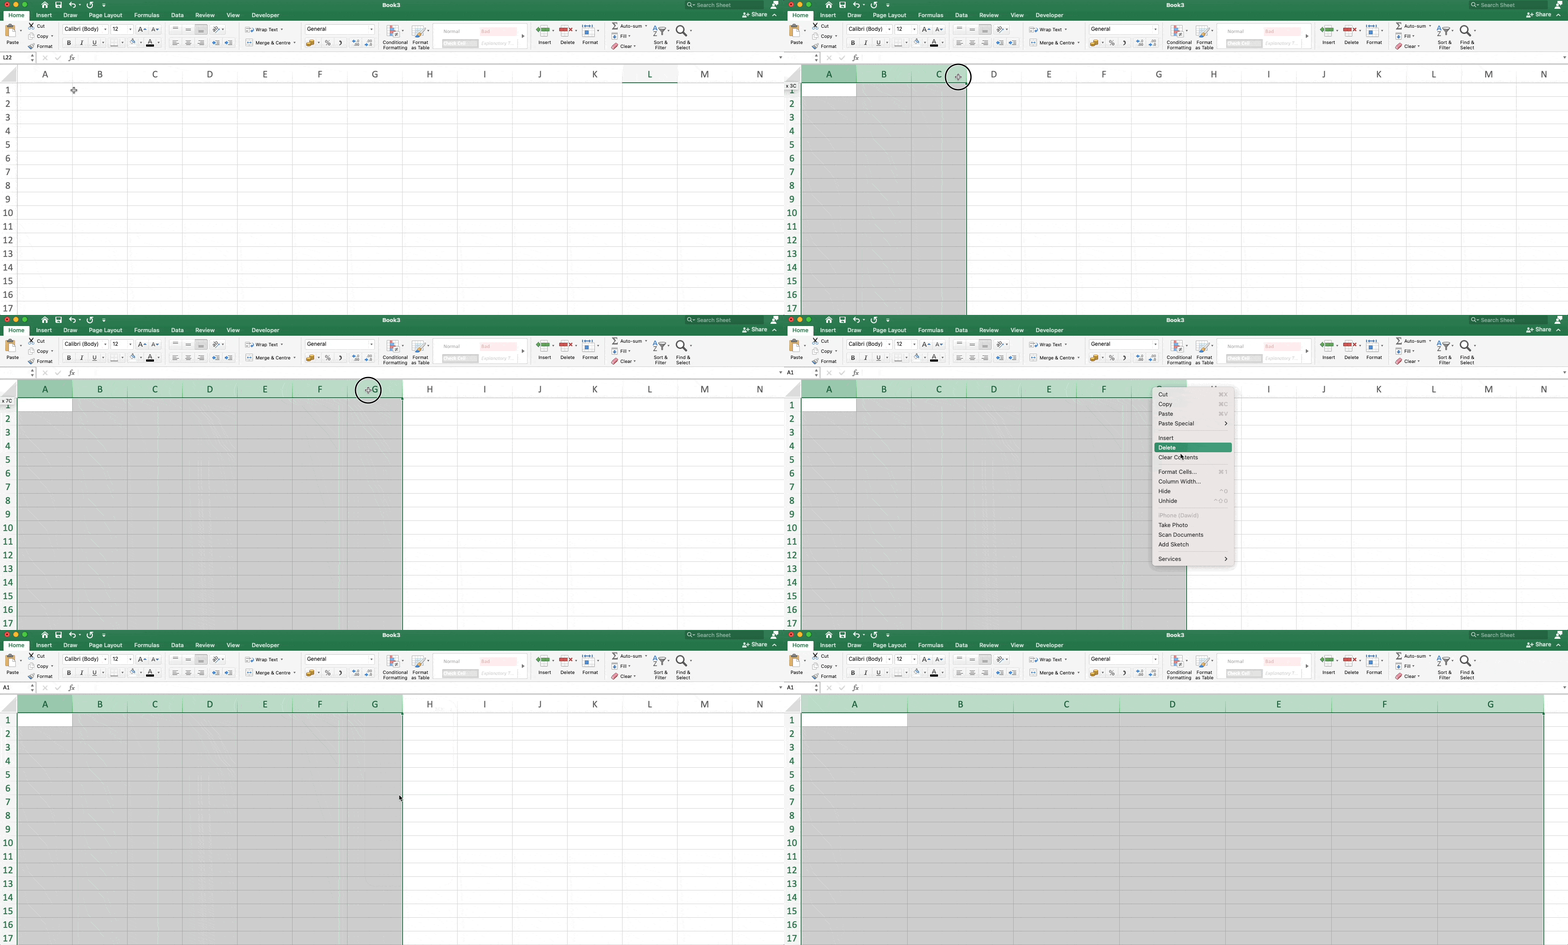
Repeat the step for rows 1 to 7 and set Row Height to “70.”
Our calendar is taking shape. Let’s give it some visual upgrades to make it look the part.
Select cells A1:G8, click Format as Table in the Home tab, and choose one of the available styles. To remove the ugly filter buttons at the top, go to Table and deselect “Filter Button.”
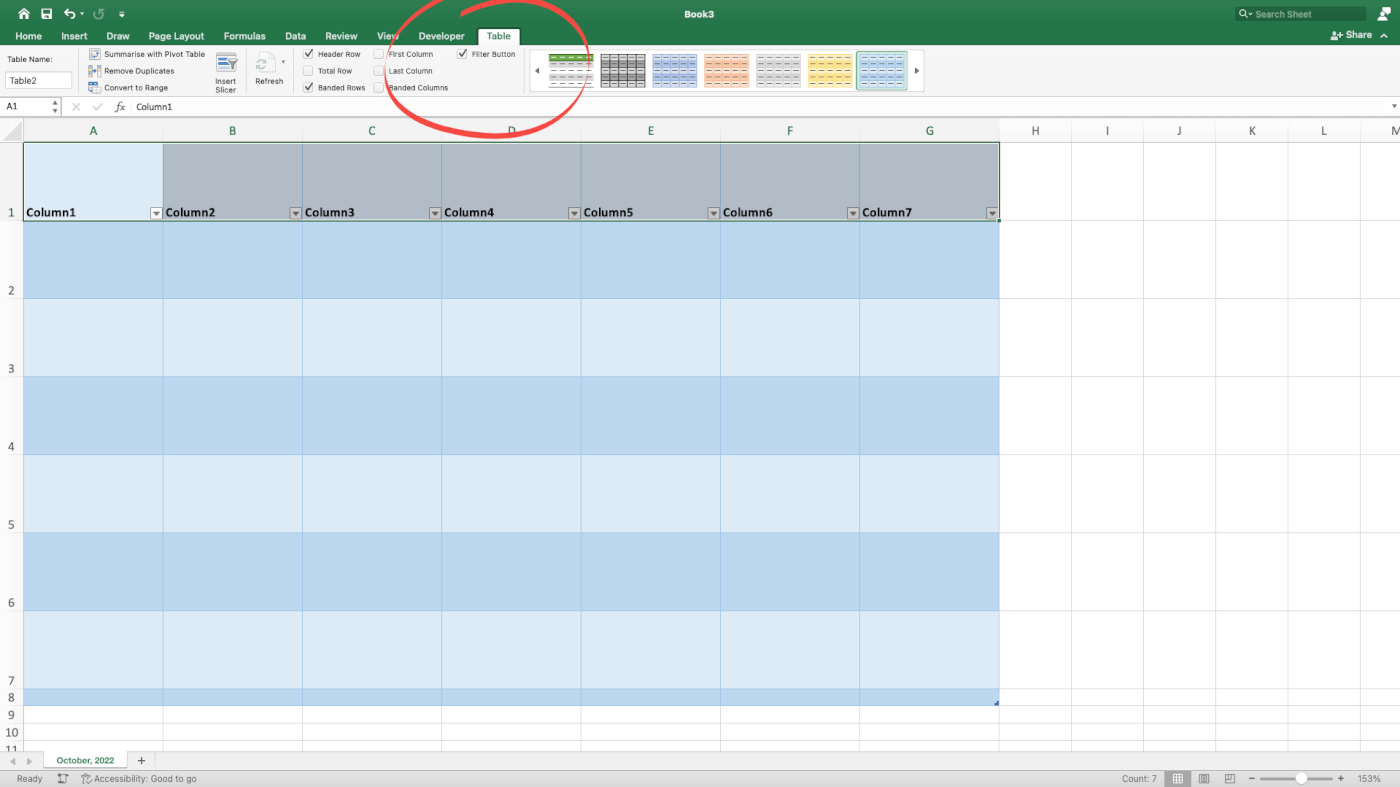
Finally, apply Align to Middle and Center Text to the top row of your table (cells A1:G1).
Now, you can add days of the week at the top of each column. Make sure to format the text so it’s easily readable. You can change the font style, size, and color.
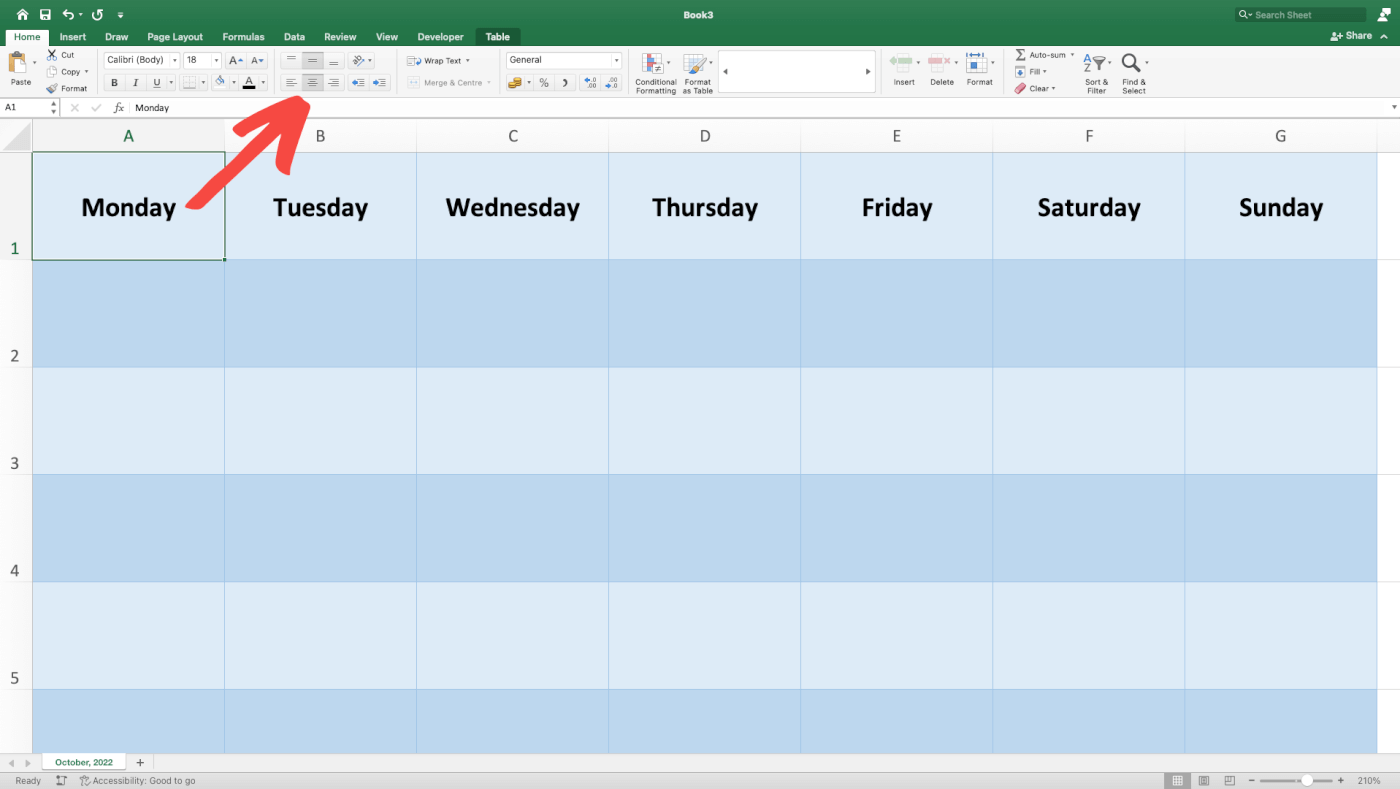
All that’s left is to number the days in our calendar. You can use a wall calendar (or the one on your phone) for reference. When done, select the cells and top-align/right-align the text.
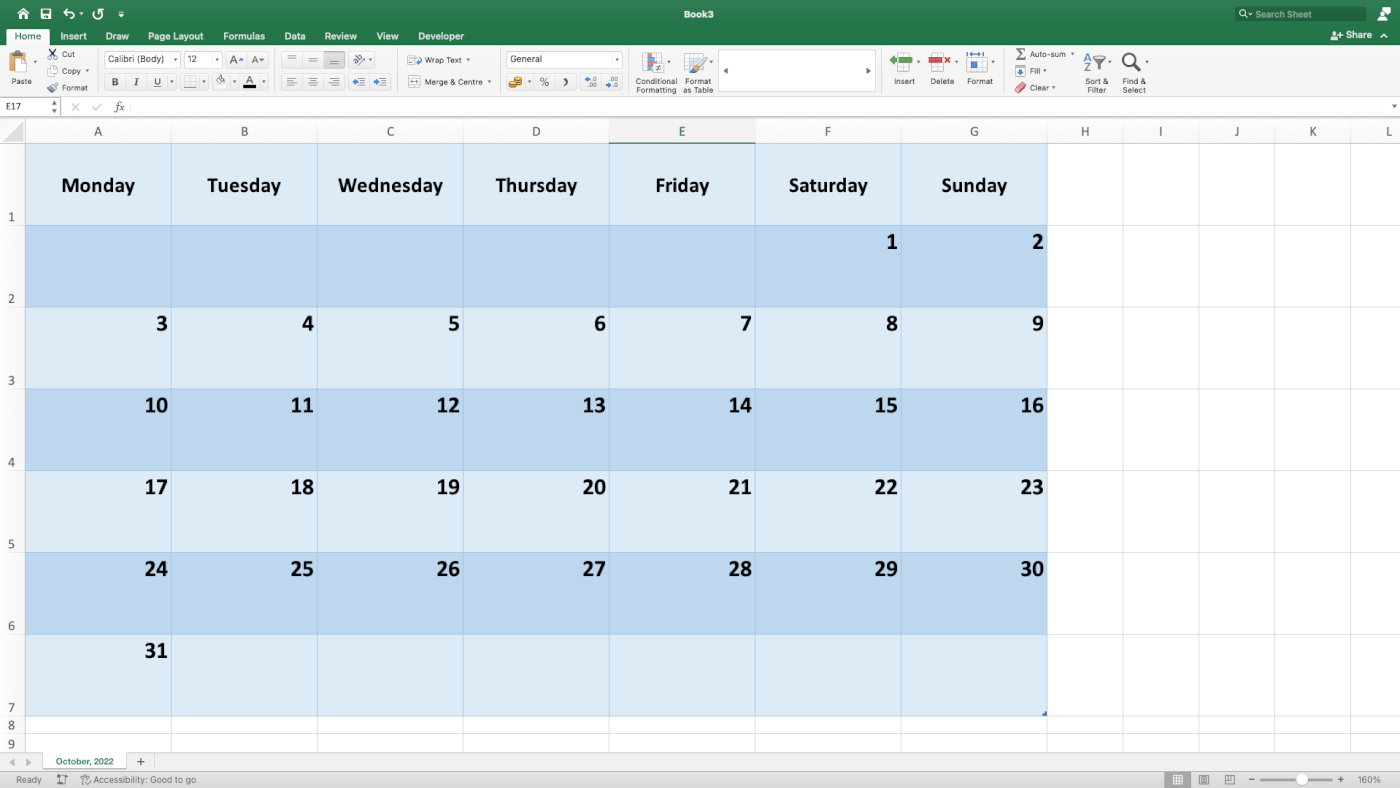
Now that you have a calendar template in place, you can create a few new sheets, one for each month, or duplicate the template to create a quarterly calendar in the same sheet.
3. Track Tasks and Events
Let’s put our new calendar to good use and start tracking monthly tasks.
The simplest way to do that is the Comment feature.
Select the day when you want to schedule a task and click New Comment in the Insert tab at the top. Write down your tasks and events using bullets or square brackets. The second approach lets you mark each task as complete by adding an “X” inside the brackets.
⚡️ Pro Tip: Press ⌨️ Shift+F2 to quickly insert a comment.
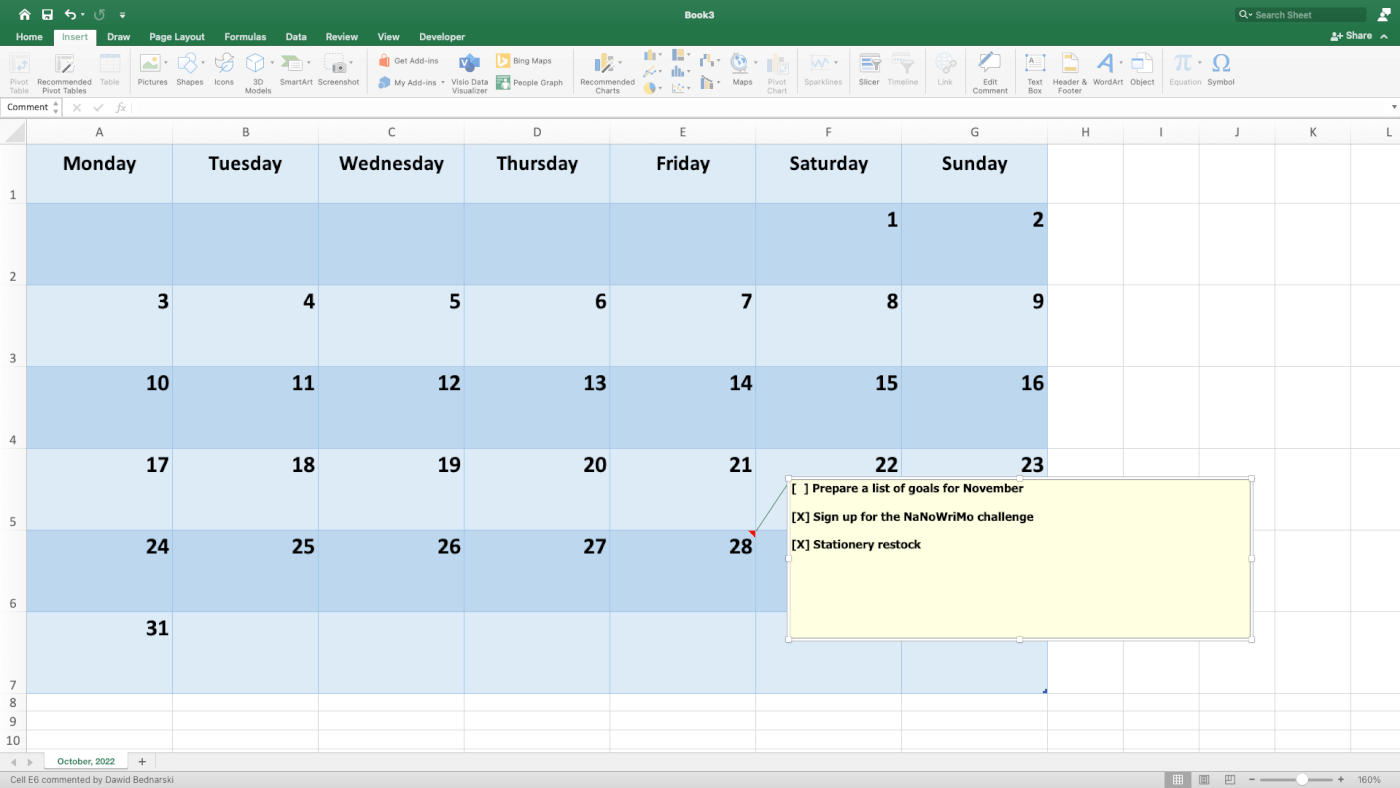
We can’t say this is the best calendar experience we’ve seen, but what can you do? 🤷♂️
Well, you can try Taskade! 🥳
🐑 Create Easy to Use Calendars With Taskade
Taskade is a powerful and user-friendly task management tool for teams and individuals.
With Taskade, you don’t have to spend hours putting together a flaky calendar. You can set up a project and start getting work done in seconds instead of hours.
All that thanks to powerful features like:
🤏 Drag & drop workflow
👀 Dynamic project views
📱 Mobile and Desktop Apps
🏷 Task sorting and #hashtags
🔄 Recurring tasks
🔔 Custom notifications
⚡️ Real-time collaboration
And more!
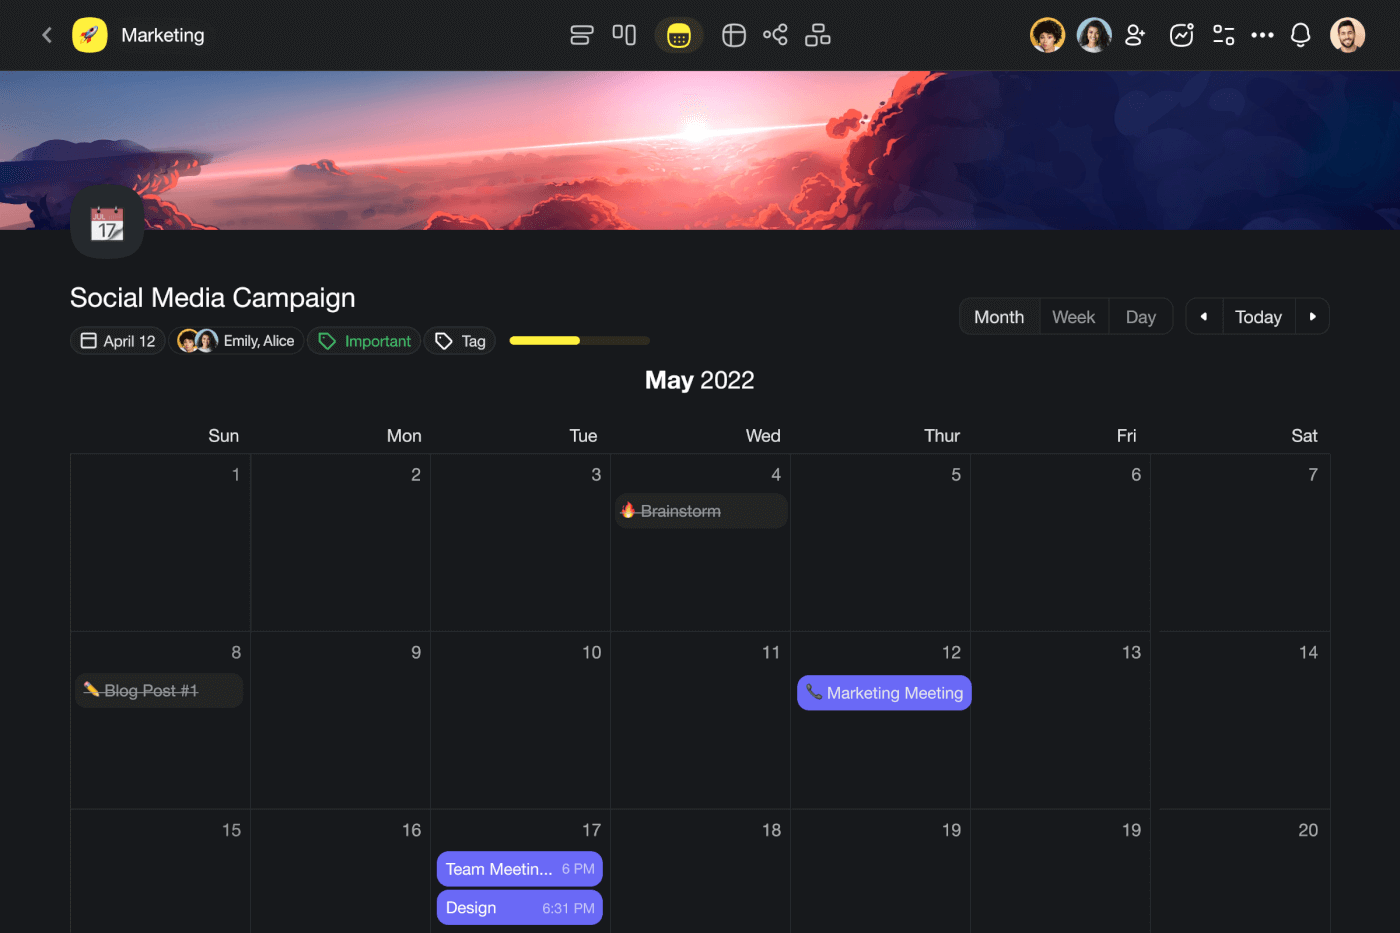
Taskade is simple, intuitive, and fun. And that’s hardly something you can say about Excel or any other member of the Office family (sorry, not sorry).
But let’s get down to business.
Taskade lets you create and manage tasks and calendar events in three ways. 🤹♂️
1. The Calendar View
Every project in Taskade is a self-contained workspace. This means you can plan your week, manage your work, and keep track of tasks without shuffling multiple apps.
To open the monthly calendar view, click  in the main dashboard. You can choose from one of the 300+ templates or create a blank project and customize everything.
All you have to do now is click the Calendar View button in the top navigation bar.
By default, the calendar shows the current month, but you can move forward or backward using the buttons in the top-right corner. You can also switch to the Weekly or Daily view.

To schedule a new task or event, simply click a date and enter event details. Add event details, adjust time and date, and click  to save changes.

2. Global Calendar
Let’s say you’re managing multiple projects, with different teams, tasks, roadmaps, and deadlines all mixed together. This is where our Global Calendar comes into play.
The Global Calendar shows you all tasks and events across all your projects within a Workspace or Folder. That means you can your finger on the pulse without shuffling multiple calendar apps.
Calnedar entries are color-coded, so you can easily distinguish between individual projects. Want to see the details of a task? Click the event and Taskade will instantly open the target project.
Finally, the Global Calendar lets you add tasks and notes to projects nested inside the parent Workspace or Folder. Simply choose a date, set the target, and enter the details of the task or note. The new entry will be instantly added to the target project.
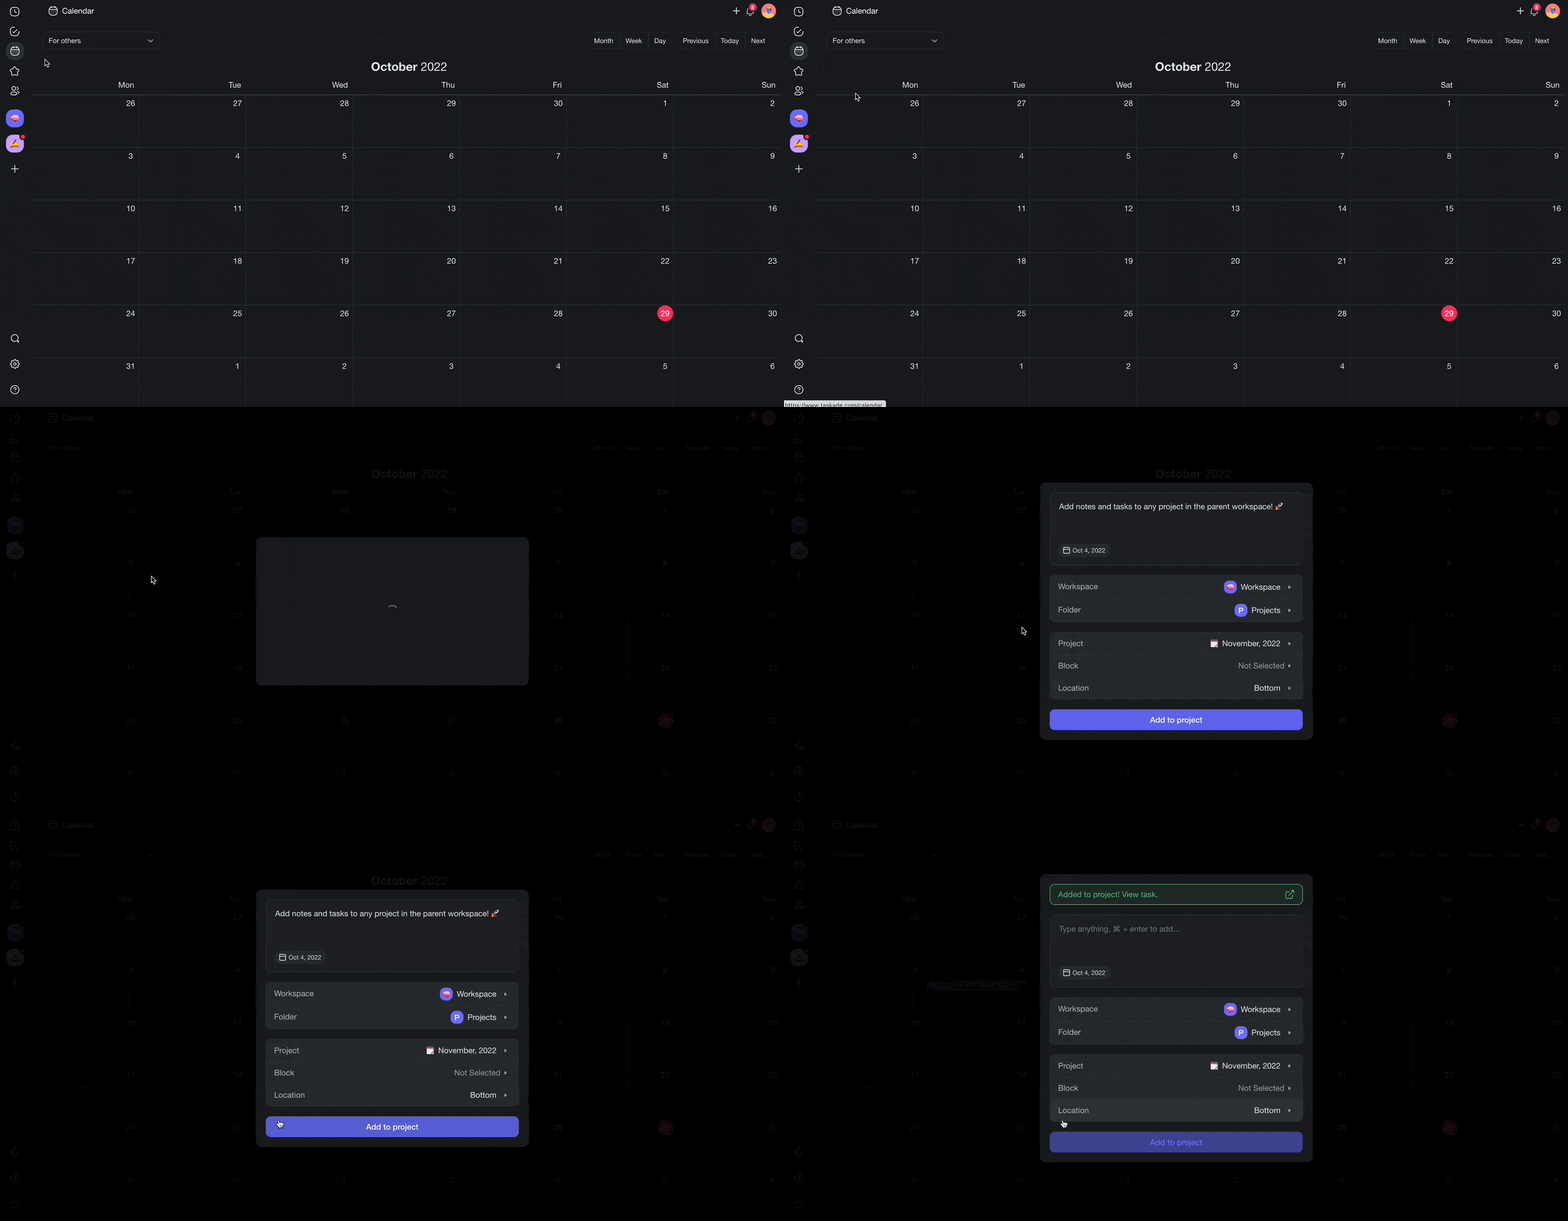
3. Calendar Integrations
There are many to-do list and calendar apps that can help you stay on top of things.
But you don’t have to juggle multiple tools to do that. 🤹♂️
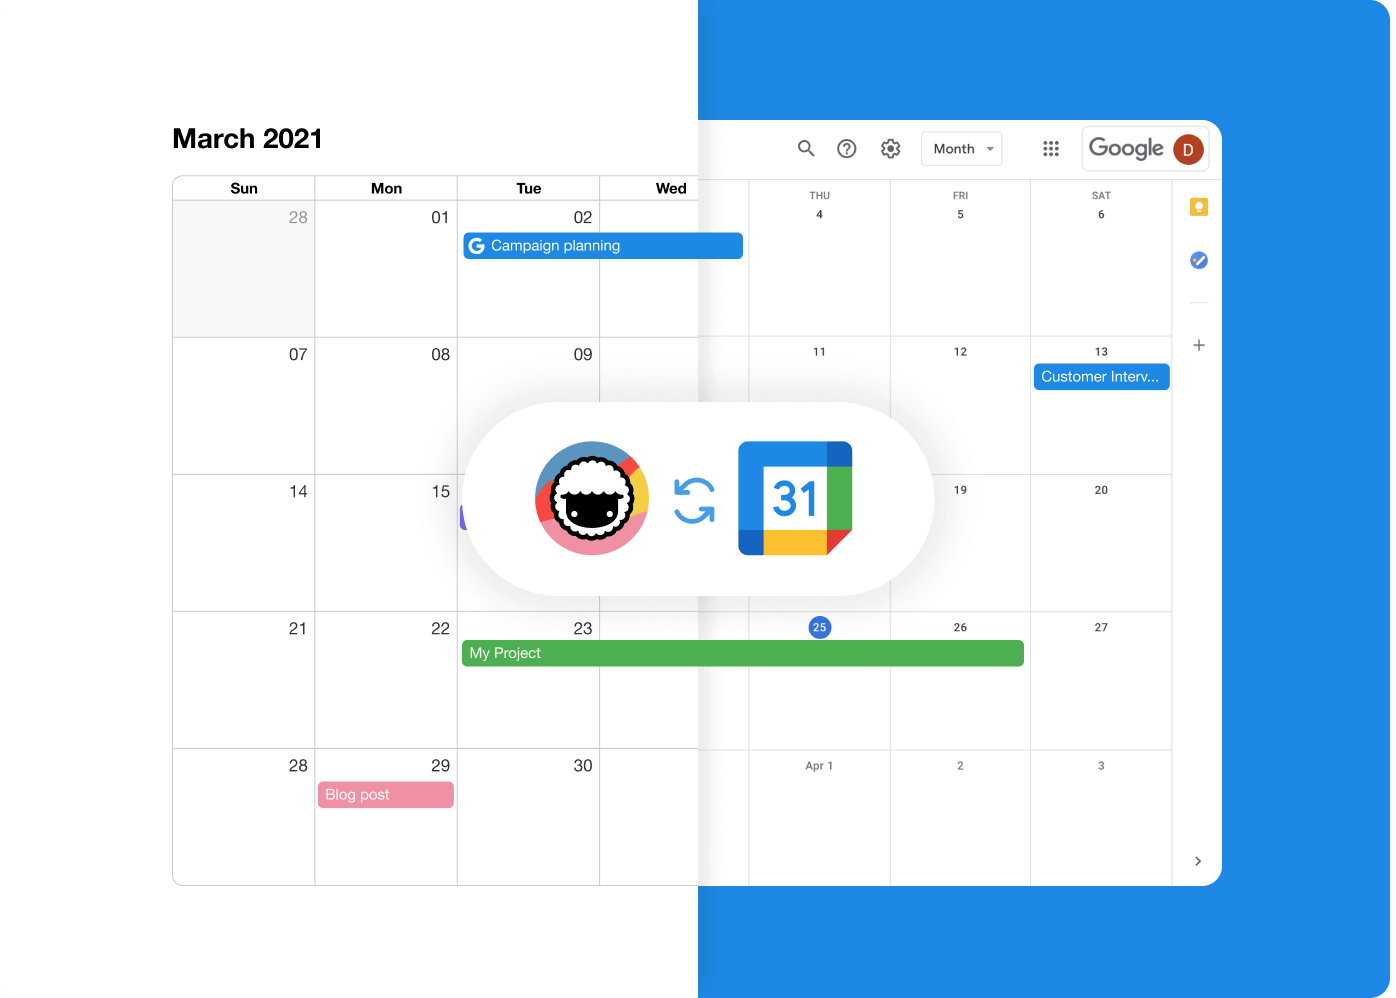
Taskade lets you sync with Outlook, iCloud, and Google calendars and see all your tasks and events in your calendar of choice. You can even enable two-way synchronization with the Google Calendar; all events you create will appear in the Taskade calendar in an instant.
Be sure to visit our Help Center to learn more about two-way Google synchronization.
And that’s it! 🥳
💬 Frequently Asked Questions (FAQ)
Is there a calendar template on Excel?
Yes. Excel features an online template catalog with several calendar workflows you can import directly into the app. Templates in Excel let you organize spreadsheets into individual months, apply different visual styles, and insert additional components like task trackers or vacation planners.
Is there a 2022 calendar template in Excel?
All of the templates available for Microsoft Excel can be easily customized. You can import one of the existing templates from the template catalog and edit the number of days in each month for 2022. Another method is to run a quick Google search for "2022 Excel calendar templates" and pick one of the free and paid alternatives from third-party content creators.
What is the formula for a calendar in Excel?
There’s no easy way to insert a calendar into an Excel spreadsheet. You can, however, use Microsoft’s Visual Basic Editor and a macro formula that will auto-generate a calendar for you. You can download the formula from the official Microsoft Learn page.
Can you convert a spreadsheet to a calendar?
You can convert any Excel spreadsheet to a calendar using Microsoft’s Visual Basic script.
1. Create a blank Workbook.
2. Select Visual Basic in the Developer ribbon.
3. Go to the Insert menu and select Module.
4. Paste the Visual Basic script from the Microsoft Learn page.
5. Navigate to the File menu and click Close.
6. Select the Sheet1 tab.
7. Go to the Developer ribbon again and click Macros.
8. Select CalendarMaker and click Run to create the calendar.
How do I add a calendar to my spreadsheet?
Follow the steps below to quickly add a calendar to your spreadsheet:
1. Open Microsoft Excel and click New in the left navigation pane.
2. Type “calendar” in the search bar in the top-right corner.
3. Choose one of the available templates to create a calendar.
You can also start with a blank workbook and follow the tips from our article. Keep in mind that you'll need to add dates and labels manually.
How do I create a recurring monthly schedule in Excel?
The bad news is that Excel doesn’t support recurring schedules out of the box. One workaround is to use a “=DATE” function to automatically generate consecutive days in the calendar based on the selected cells.
🐑 Conclusion
Excel is an impressive piece of software that can do much more than advertised.
But 9 times out of 10, the simplest solution is the best.
Taskade makes your life easier by simplifying planning and task management. You don’t have to spend hours building calendars from scratch. All the tools you need are just a click away!
So, what are you waiting for?
Make an appointment with Taskade (pun not intended) and sign up for a free account today. 👈
💡 Before you go... ... Enjoyed the article? Be sure to check our article on how to create a to-do list in Excel next. You can also visit our YouTube channel for more project management insights.