
TL;DR: Taskade Genesis turns a single prompt into a complete, living app built on four layers of Workspace DNA: Projects (memory), Agents (intelligence), Automations (execution), and the App UI (interface). In this guide you'll build a working customer feedback portal in under ten minutes — and publish it to a live URL. Over 150,000+ apps have been built this way. Try it free →

What You'll Build
You will build a Customer Feedback Portal — a real, shareable app that collects feedback from customers, stores it in a structured database, triages each entry with an AI agent, and routes urgent issues to your team automatically. By the end you'll have a live URL you can send to anyone.
This single tutorial touches every layer of the Taskade platform, so once you finish it, you'll know how to build almost anything: client portals, internal dashboards, booking tools, inventory trackers, intake forms, or interactive learning apps.
| Traditional development | With Taskade Genesis |
|---|---|
| Wireframes, schemas, and tickets | Describe the app in plain English |
| Hire developers, configure servers | Generated and hosted in minutes |
| Build dashboards from scratch | Choose from 7 project views instantly |
| Stitch together auth, storage, email | 100+ integrations work out of the box |
| Ship in months | Ship today, iterate by chatting |
The Four Layers of Every Genesis App
Every Taskade Genesis app is assembled from the same four DNA layers. Understanding them up front makes everything that follows feel obvious.
| Layer | Workspace DNA role | What it does in your app |
|---|---|---|
| 1. Projects | Memory | Stores structured data — feedback entries, customers, tasks. View it 7 ways: List, Board, Calendar, Table, Mind Map, Gantt, Org Chart. |
| 2. Agents | Intelligence | AI teammates with persistent memory, custom instructions, and 22+ built-in tools. They read your projects, write to them, and talk to your users. |
| 3. Automations | Execution | Trigger-and-action automations that run on schedule or on event. Connect to 100+ integrations across 10 categories. |
| 4. App UI | Interface | The pages, forms, buttons, and dashboards your end users actually see and click. Generated from your prompt, editable by chat or visual selector. |
This is the framing every great Genesis builder internalizes: Memory feeds Intelligence. Intelligence triggers Execution. Execution writes back to Memory. A Genesis app is that loop wrapped in a UI. Read Workspace DNA explained for the deeper conceptual model.
Step 1: Write Your Prompt
The single most important skill in Taskade Genesis is writing a good first prompt. A good prompt names the users, the data, the actions, and the outcome. A vague prompt produces a vague app.
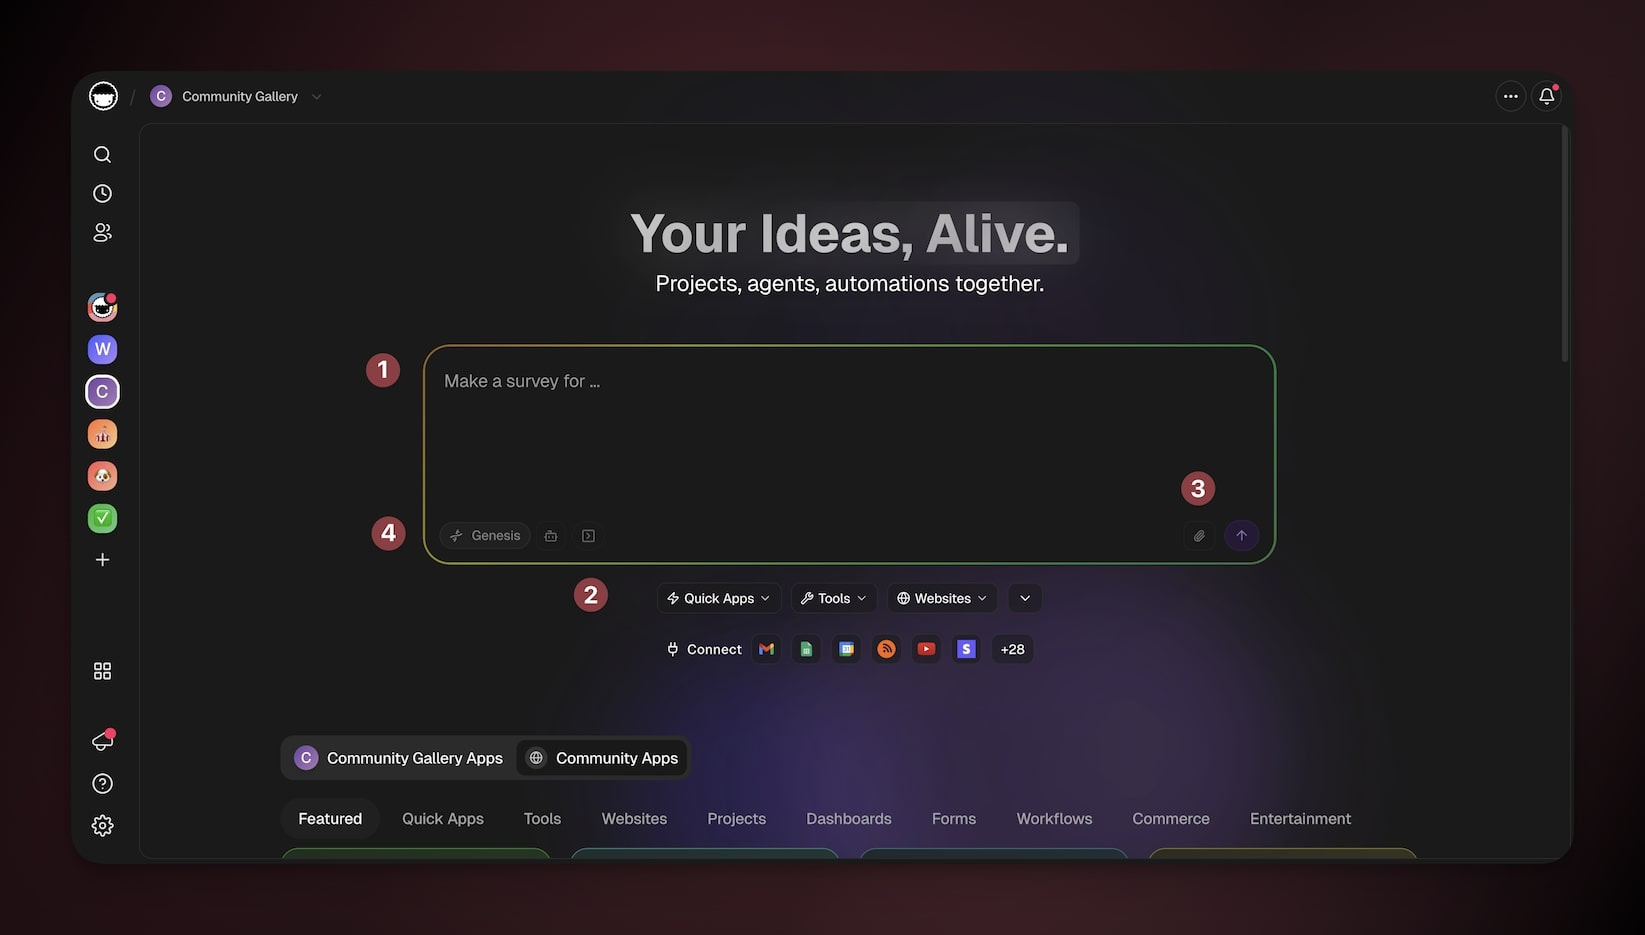
Open Taskade and click Create. You'll see a prompt field at the center of the screen.
Vague prompt (avoid):
"Make a feedback app."
Good prompt (use this pattern):
"Build a customer feedback portal where users can submit feedback with a title, description, category (bug, idea, praise), and severity (low, medium, high). Store every submission in a Feedback project. Show submitted feedback in a public board grouped by category. When a high-severity bug is submitted, notify our team in Slack and create a follow-up task assigned to the on-call engineer."
Notice what the good prompt includes:
- Who uses it — customers submitting, our team receiving
- What data it captures — title, description, category, severity
- Where data lives — a Feedback project
- How users see it — a public board grouped by category
- What happens automatically — Slack notification + follow-up task on high-severity bugs
For a deeper walkthrough of prompt patterns, see A Maker's Guide to AI Prompts and Writing your first prompt.
Pro tip: You don't need to get the prompt perfect. Taskade Genesis is iterative. You'll refine the app by chatting with it. Start with the clearest version you can write in 60 seconds, then improve.
Optional: add context
Click the paperclip (📎) icon to attach reference material — a brand guide, a CSV of existing customers, a screenshot of an app you like, or a PDF of requirements. Taskade Genesis reads everything you upload and uses it as the source of truth while building.
You can also pick a creation mode before pressing enter:
- Genesis (default) — assemble a complete, living app
- Project — focus on data and views only
- Agents — focus on building an AI teammate
- Automation — focus on a workflow
For your first app, leave it on Genesis.
Step 2: Watch Genesis Assemble It
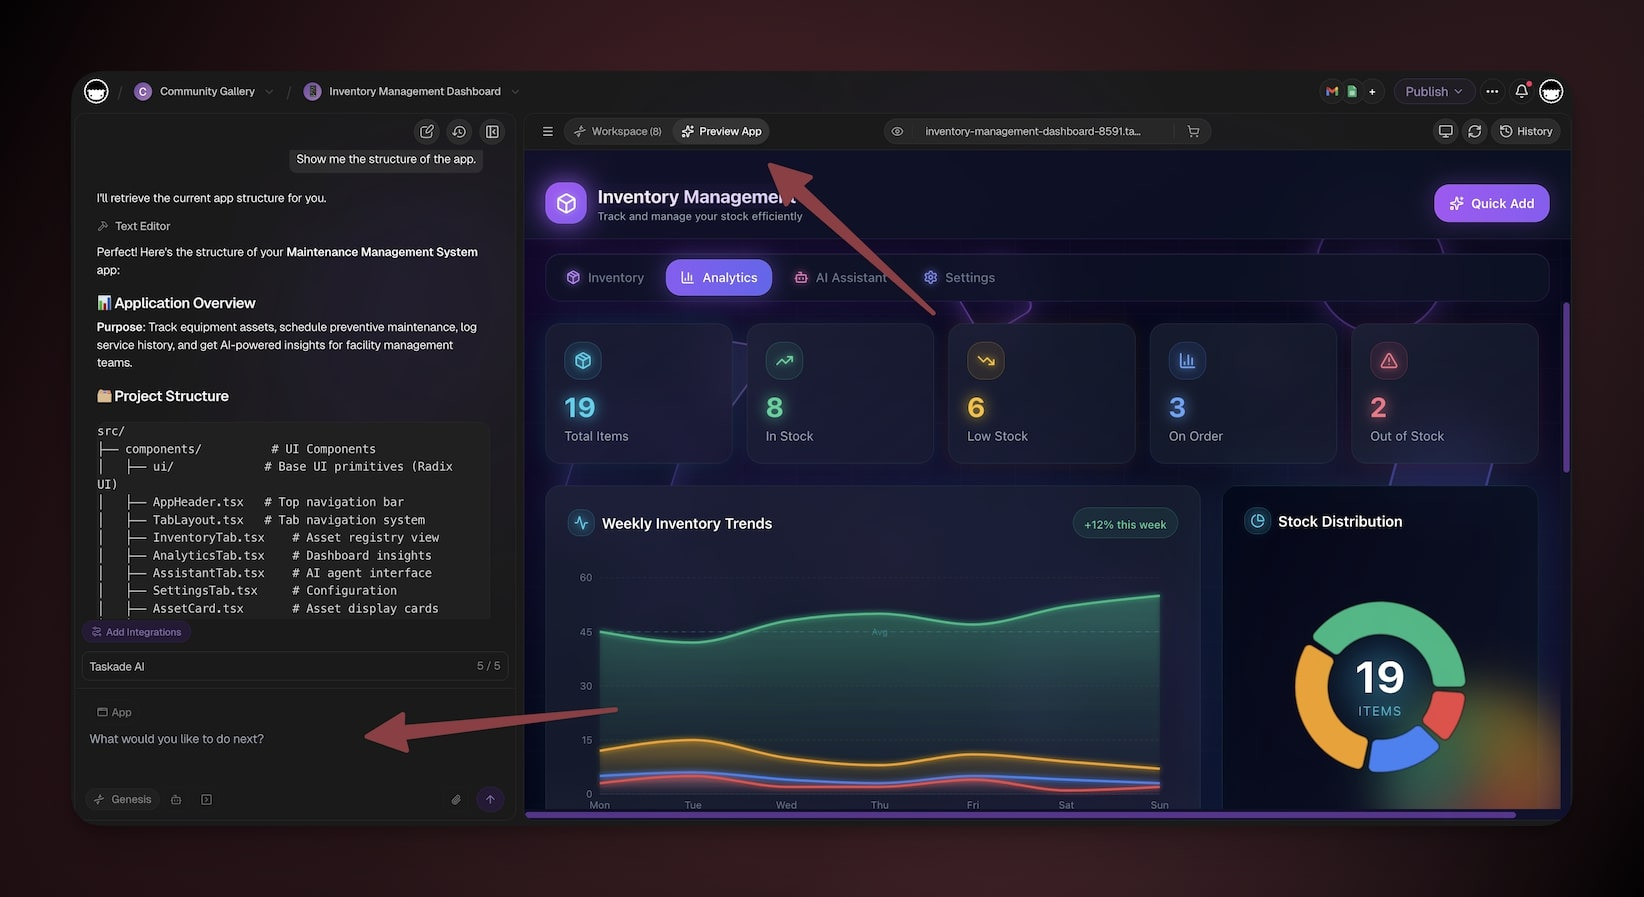
Press Generate. Genesis now runs through the assembly order in real time. You can watch each layer light up as it's built.
Assembly typically takes 60–120 seconds depending on app complexity. While it builds, you'll see the four layers populate in the left sidebar:
- Projects — your Feedback database appears with the columns you described
- Agents — a Triage Agent is added with custom instructions
- Automations — an automation with a "new entry" trigger and Slack action
- App UI — pages for the form, the board, and the admin view
When the build finishes, the Preview tab opens automatically. Your app is already live — submit a test entry and watch the loop fire.
Step 3: Customize the App UI
The App UI is the surface your users will actually touch. Genesis gives you two ways to refine it: chat or click.
Refine by chat
Open the Build chat on the left and describe what you want to change. One change at a time produces the best results.
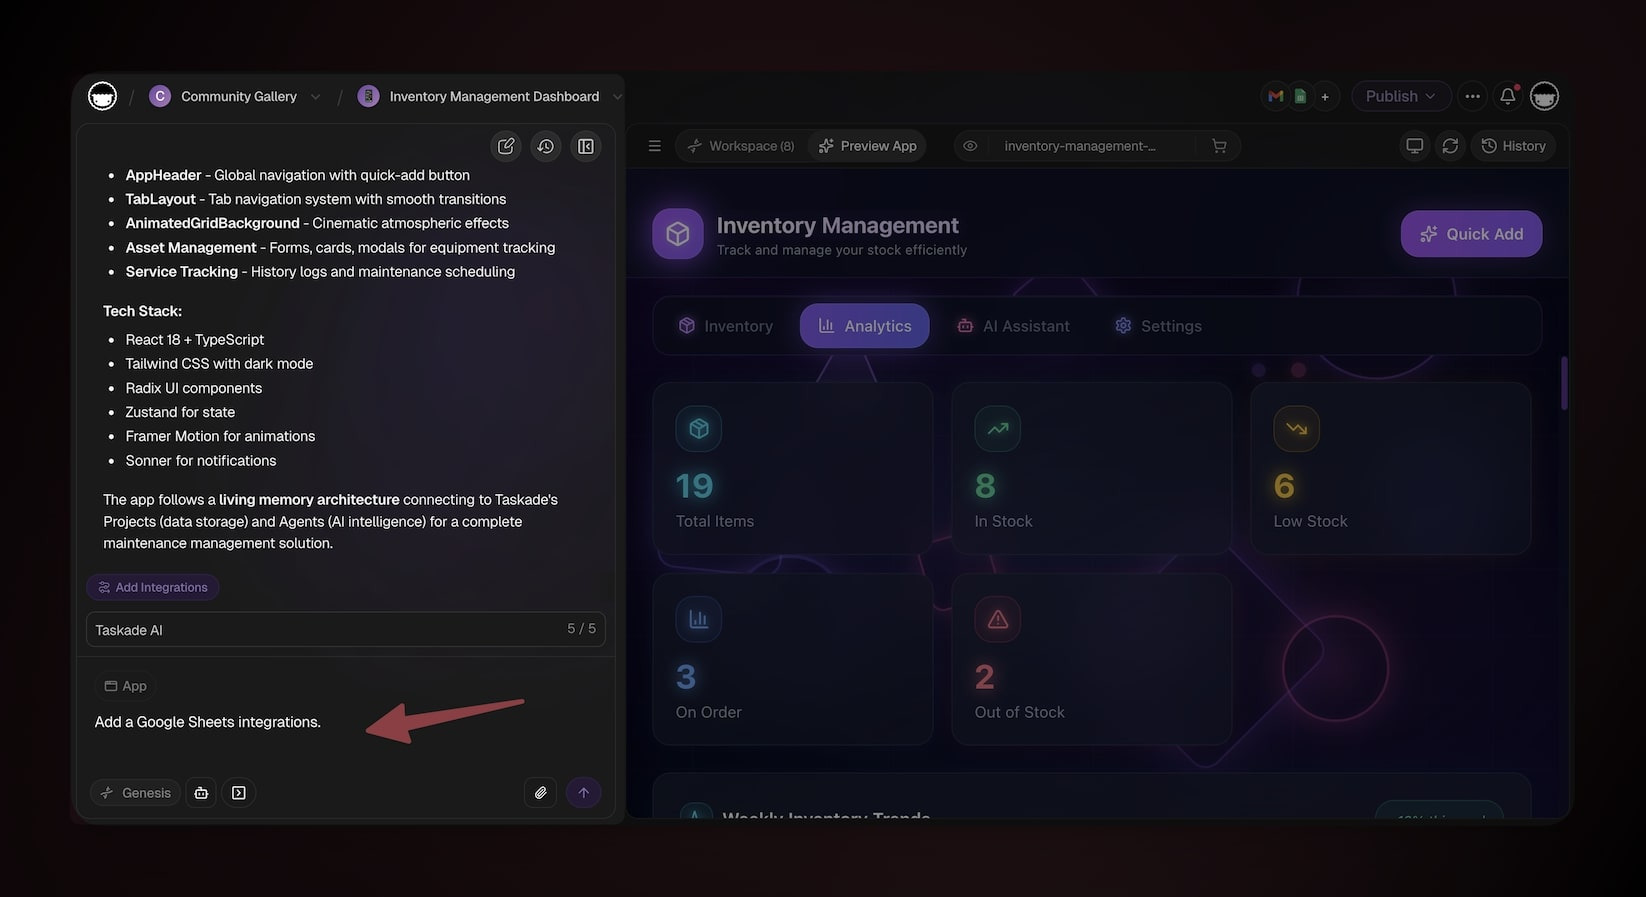
Useful prompts:
"Use our brand pink #ff2d60 as the primary color and Inter as the font.""Add a confirmation message after a user submits feedback.""Make the public board read-only for visitors but editable for signed-in team members.""Add a chart to the admin dashboard showing feedback volume by week.""Embed the Triage Agent on the admin page so the team can ask it questions."
Refine by click
Use the Element Selector to point at any element — a heading, a button, a card, an image — and edit its properties directly. No code, no inspector, just click and adjust. Combine the selector with chat for the fastest workflow: click the thing you want to change, then describe the change in plain English.
Adjust permissions
Taskade uses 7-tier role-based access: Owner, Maintainer, Editor, Commenter, Collaborator, Participant, and Viewer. Tell Genesis who should see what:
"Only Maintainers and Owners can see the admin dashboard.""Anyone with the link can submit feedback, but only signed-in users see their own history."
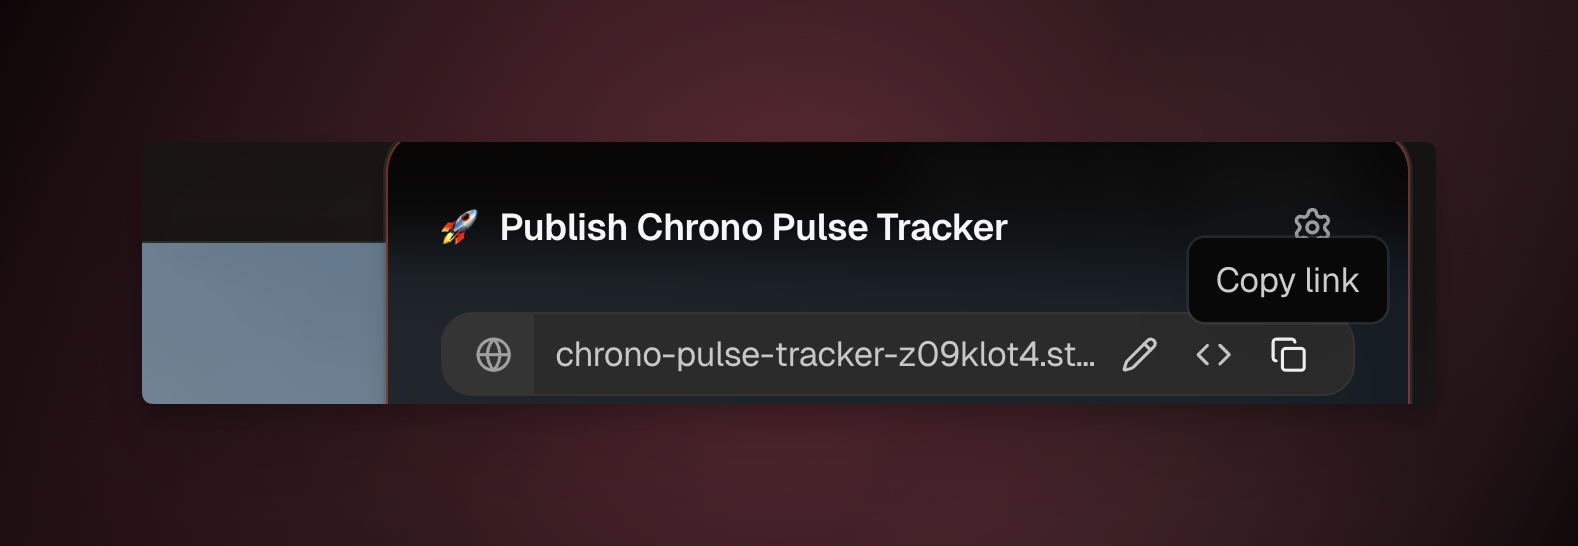
Step 4: Publish Your App
Click Publish in the top-right. You have three visibility options and three distribution channels.
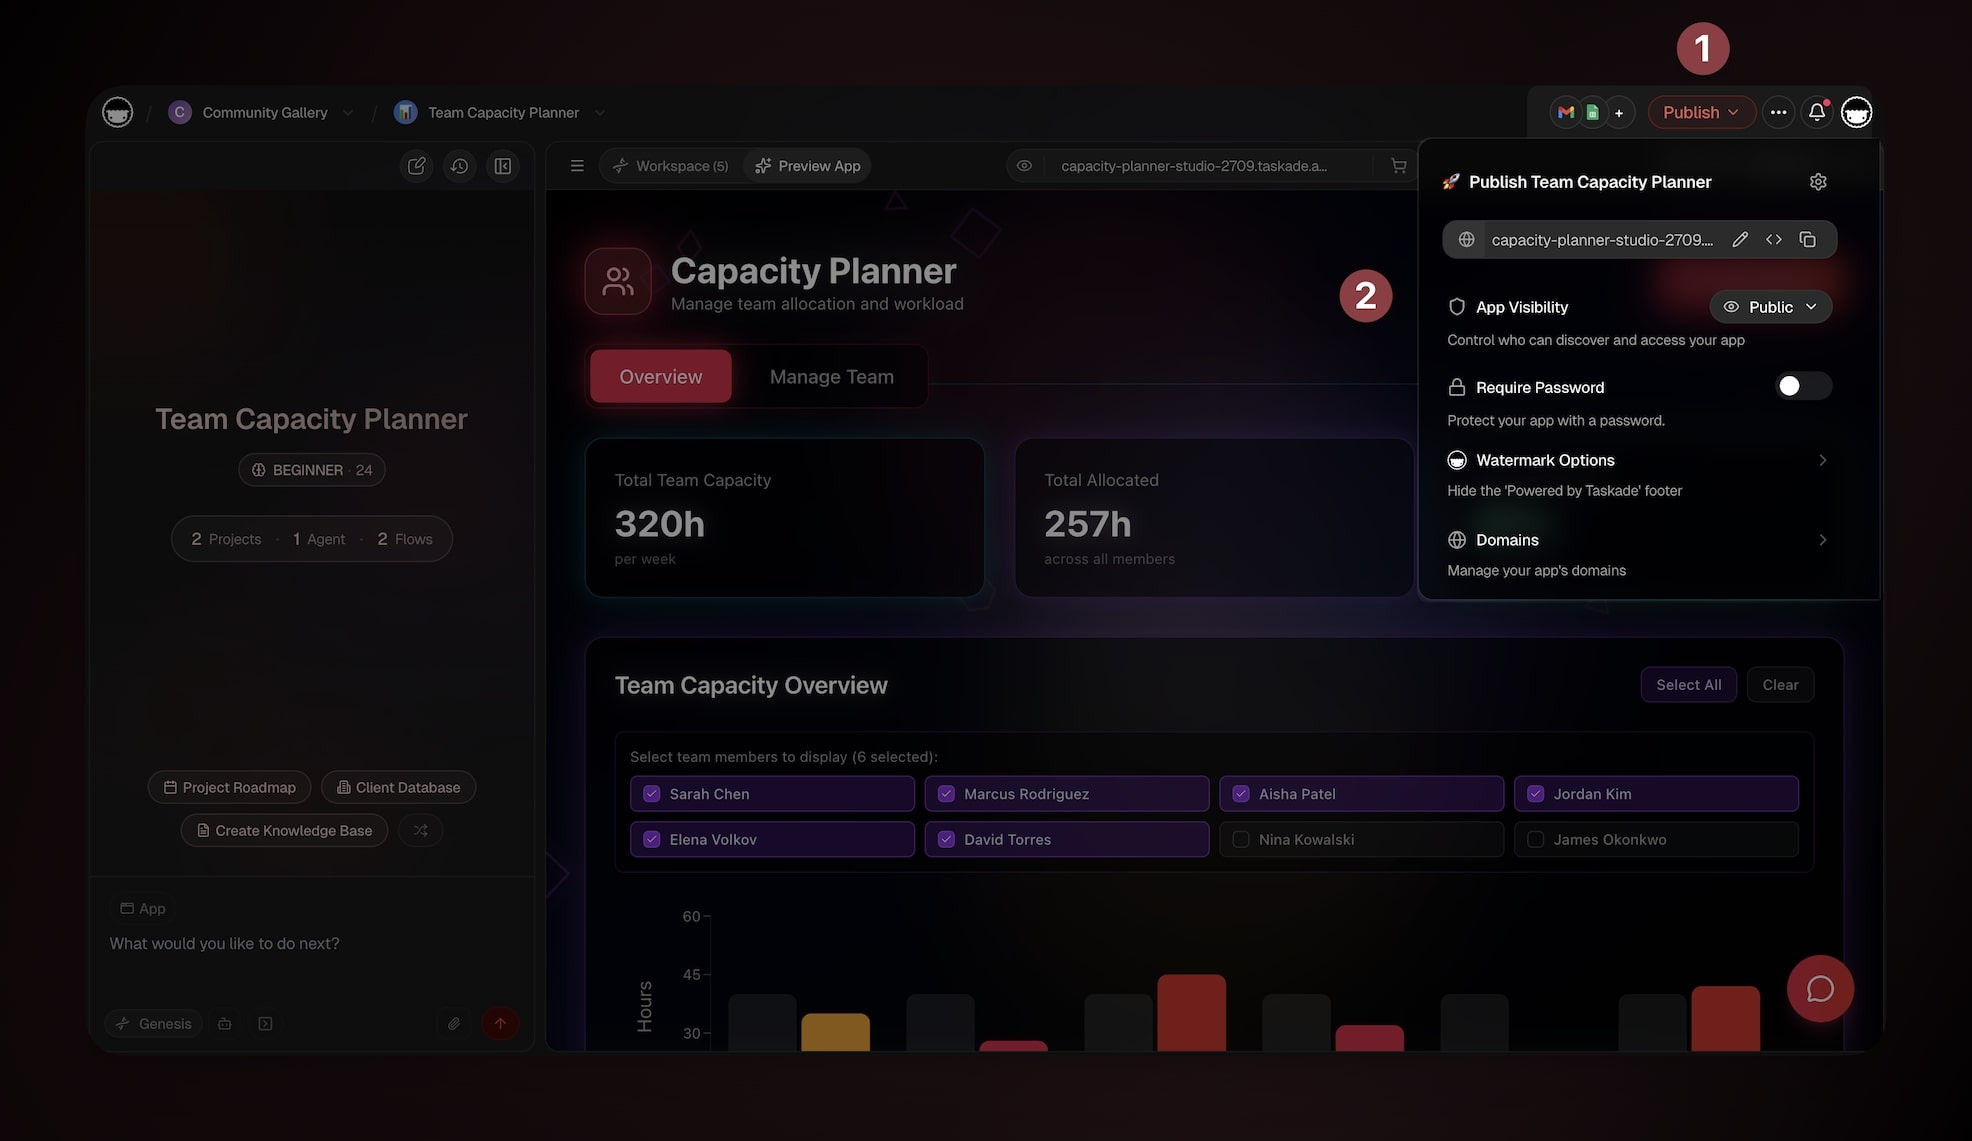
Visibility:
- Private — only people in your workspace
- Secret — anyone with the link, not indexed
- Public — discoverable and embeddable
Distribution:
- Direct link — share
taskade.com/a/your-appwith anyone - Custom domain — point your own domain at the app with automatic SSL. See Custom domains
- Community Gallery — publish to the public showcase where over 150,000 apps live, get featured, and let others clone your app. See Publishing to the Community Gallery
You can also lock the app behind a password, embed it in a website with an <iframe>, or share it on social.
That's it. Your first app is live. 🎉
What Just Happened: The Four Layers in Your Build
Now that you have a working app, let's look at what Genesis actually assembled — layer by layer — using the customer feedback portal you just built.
Layer 1 — Projects (Memory)
Genesis created a Feedback project with four typed columns and a Board view grouped by category. This project is a real database — every submission becomes a row, and you can switch between any of the 7 project views (List, Board, Calendar, Table, Mind Map, Gantt, Org Chart) without rebuilding anything. The project is the app's long-term memory: agents read from it, automations write to it, the UI displays it. Learn more in Projects and databases.
Layer 2 — Agents (Intelligence)
Taskade Genesis added a Triage Agent with custom instructions ("read each new feedback entry, classify severity, suggest next steps"). The agent has persistent memory of your Feedback project and can use any of 22+ built-in tools. You can choose which of the 15+ frontier models from OpenAI, Anthropic, Google, and open-weight providers powers it depending on the cost and reasoning depth you need. Learn more in Custom agents.
Layer 3 — Automations (Execution)
Genesis built a workflow with a trigger (new feedback entry where severity = high) and actions (post a message to Slack, create a follow-up task assigned to the on-call engineer). Automations can branch, loop, filter, and chain across 100+ integrations across 10 categories — Communication, Email/CRM, Payments, Development, Productivity, Content, Data/Analytics, Storage, Calendar, and E-commerce. Learn more in Automations and execution.
Layer 4 — App UI (Interface)
Genesis generated three pages: a public submission form, a public read-only board, and a private admin dashboard. The UI is regenerated on every build and editable through chat or the Element Selector. It's not a wireframe — it's the production interface your users will actually use.
The loop: A user submits feedback through the UI → the entry lands in Projects (memory) → the Triage Agent reads it (intelligence) → the Automation fires Slack and creates a task (execution) → the new task lands back in Projects (memory). That's Workspace DNA in motion.
Common First-Time Questions
Do I need to know how to code?
No. If you can describe a problem in English, you can build a Genesis app. Every change — from layout tweaks to adding a new automation — happens through chat or visual editing. There is no code to write, deploy, or maintain.
How long does it take to build a real app?
Most first apps go from prompt to published URL in under ten minutes. More elaborate apps (multi-page dashboards, complex automations, custom agents) typically take 30–60 minutes of iteration. There is no compile, no deploy, and no hosting setup at any point.
Can I change the app after it's published?
Yes. Open the app any time and chat with the Build agent. Changes are live as soon as they're saved — there is no separate publish step for edits. You can also roll back to an earlier version from the version history.
What does it cost?
The Free plan gets you 3,000 one-time credits, enough to build and ship your first apps. From there: Starter ($6/mo), Pro ($16/mo, includes 10 users), Business ($40/mo), Max ($200/mo), and Enterprise ($400/mo). All prices are annual billing. See the full breakdown in Genesis FAQ.
Can I use my own domain?
Yes. Point any custom domain at your app and Taskade handles SSL automatically. See Custom domains.
Can other people clone my app?
If you publish to the Community Gallery, yes — anyone can clone your app into their own workspace and customize it. This is one of the fastest ways to learn: clone an app you like and inspect how it was built. See Publishing to the Community Gallery.
Next Steps
You've built a real app. Here's what to do next:
- Build a second app from a different angle — try an internal tool like a content calendar or a personal CRM. You'll start to feel how the four layers compose.
- Customize your Triage Agent — give it sharper instructions, connect it to more tools, and embed it on a public page so anyone can ask it questions.
- Add a second automation — schedule a weekly digest of new feedback emailed to your team.
- Publish to the Community Gallery — get feedback from the maker community and see your app cloned by others.
Related guides
- Workspace DNA explained — the conceptual model behind every Genesis app
- Taskade Genesis overview — what Genesis is and why it exists
- Writing your first prompt — the anatomy of a prompt that builds great apps
- A Maker's Guide to AI Prompts — patterns and starter prompts
- Custom agents — give your app a smart teammate
- Projects and databases — the memory layer in depth
- Automations and execution — the execution layer in depth
- Publishing to the Community Gallery — share, get featured, get cloned
- Custom domains — ship on your own URL
- Edit visually with the Element Selector — click any element and tell Taskade EVE what to change
- Genesis App URLs — Spaces vs Projects vs Automations
- Genesis FAQ — pricing, limits, and common questions